New Features in 8.1.2 and 8.1.3
Light Editor:
Introduction:
Share light editor (SLE) enables users to edit video before publishing. Examples of what can be done include adding an Intro/Outro to the clip from pre-defined list of videos and/or adding Slate to the clip.
There are two primary parts to Share light editor:
Defining the videos/images, referred to as Assets, in the system to be used during editing clip
Allowing users the Share light editor functionality by enabling it on Roles page.
Assigning SLE to users
From the “Settings” page, select “Roles” from the list on the left-hand side of the screen
Select the Role that you wish to add SLE to and from the page that appears, click the “Permissions” tab
On the “Permissions” tab, check “Share light editor” as shown in the image below
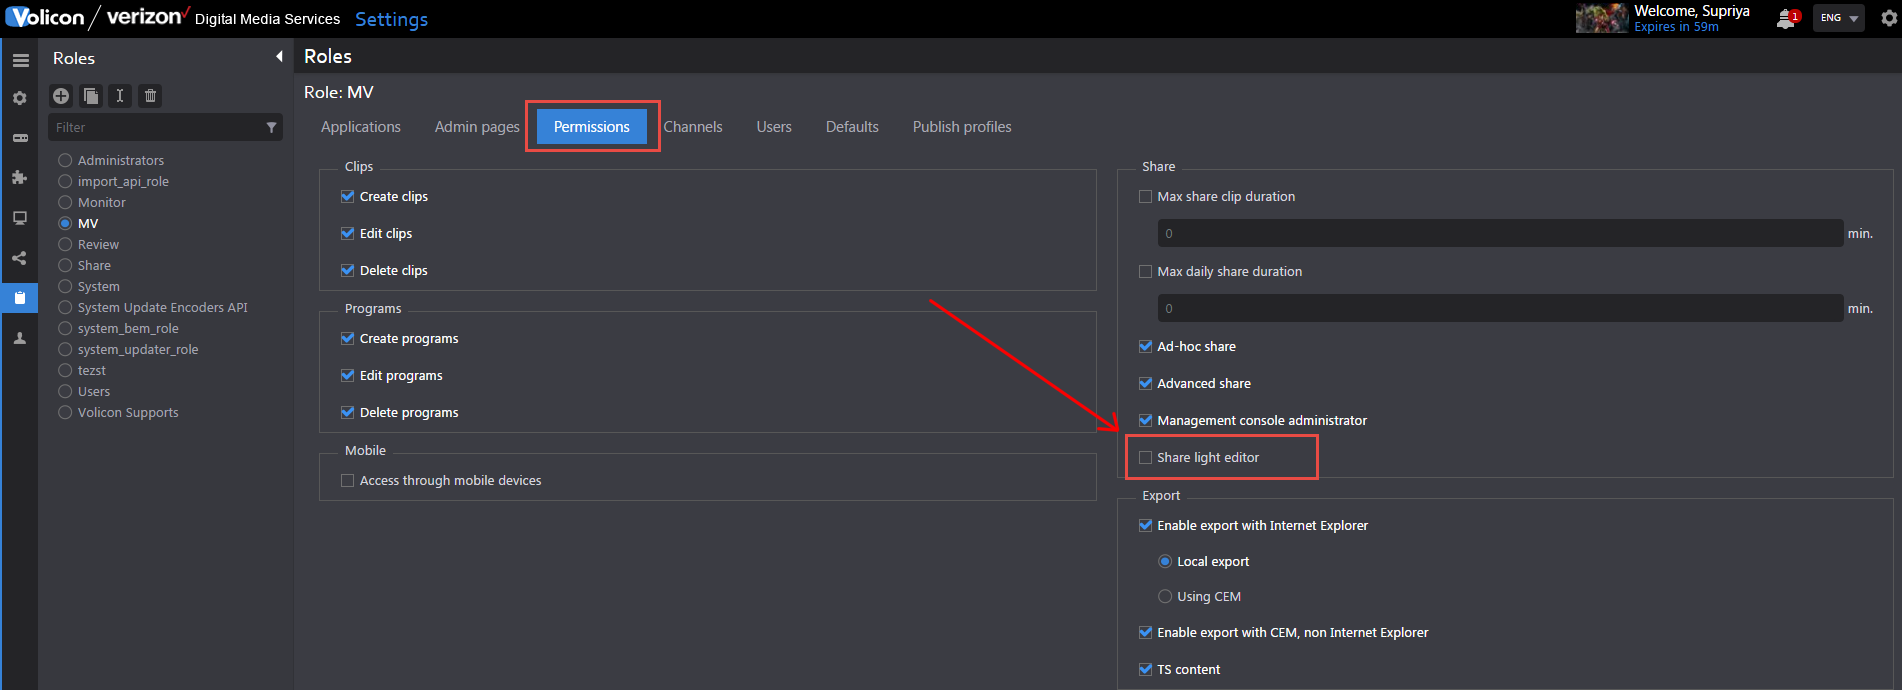
This will enable SLE on the desired Role and all users, which are a part of this role, will have Share light Editor
Assigning Asset Library to users
From the “Settings” page, select “Roles” from the list on the left-hand side of the screen
Select the Role that you wish to add SLE to and from the page that appears, click the “Applications” tab
On the “Applications” tab under the “Share” Module, check “Asset Libary” as shown in the image below
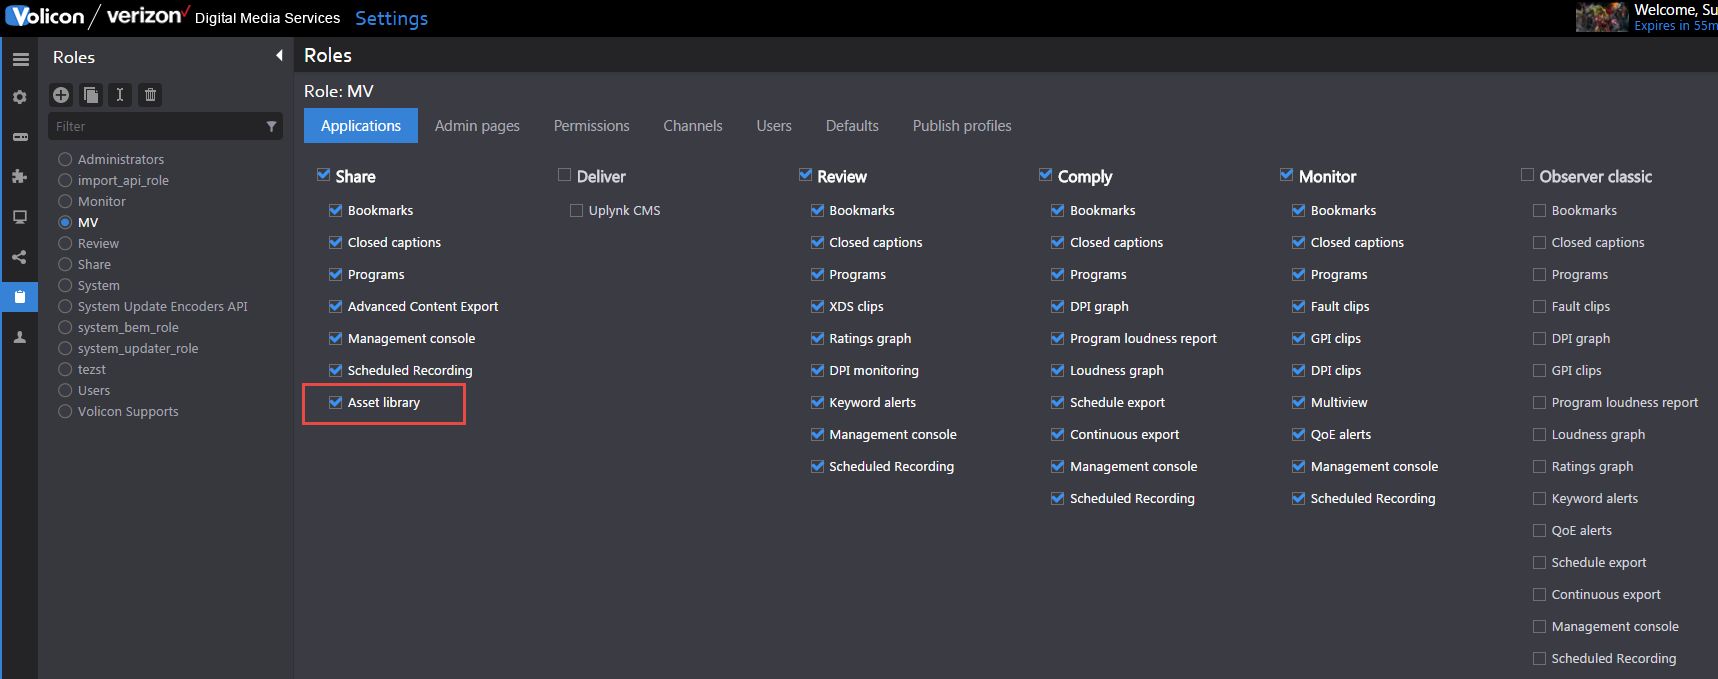
This will enable Asset Library on the desired Role and all users, which are a part of this role, will be able to upload and manage a list of intros/outros.
Asset library
Overview:
This page is for managing the intro/outro (video) files and Slate (Image) files.
Adding Assets
Asset can be added by clicking on + button and then from the sliding window that appears on the right-hand side of the screen selection the “Upload” button.
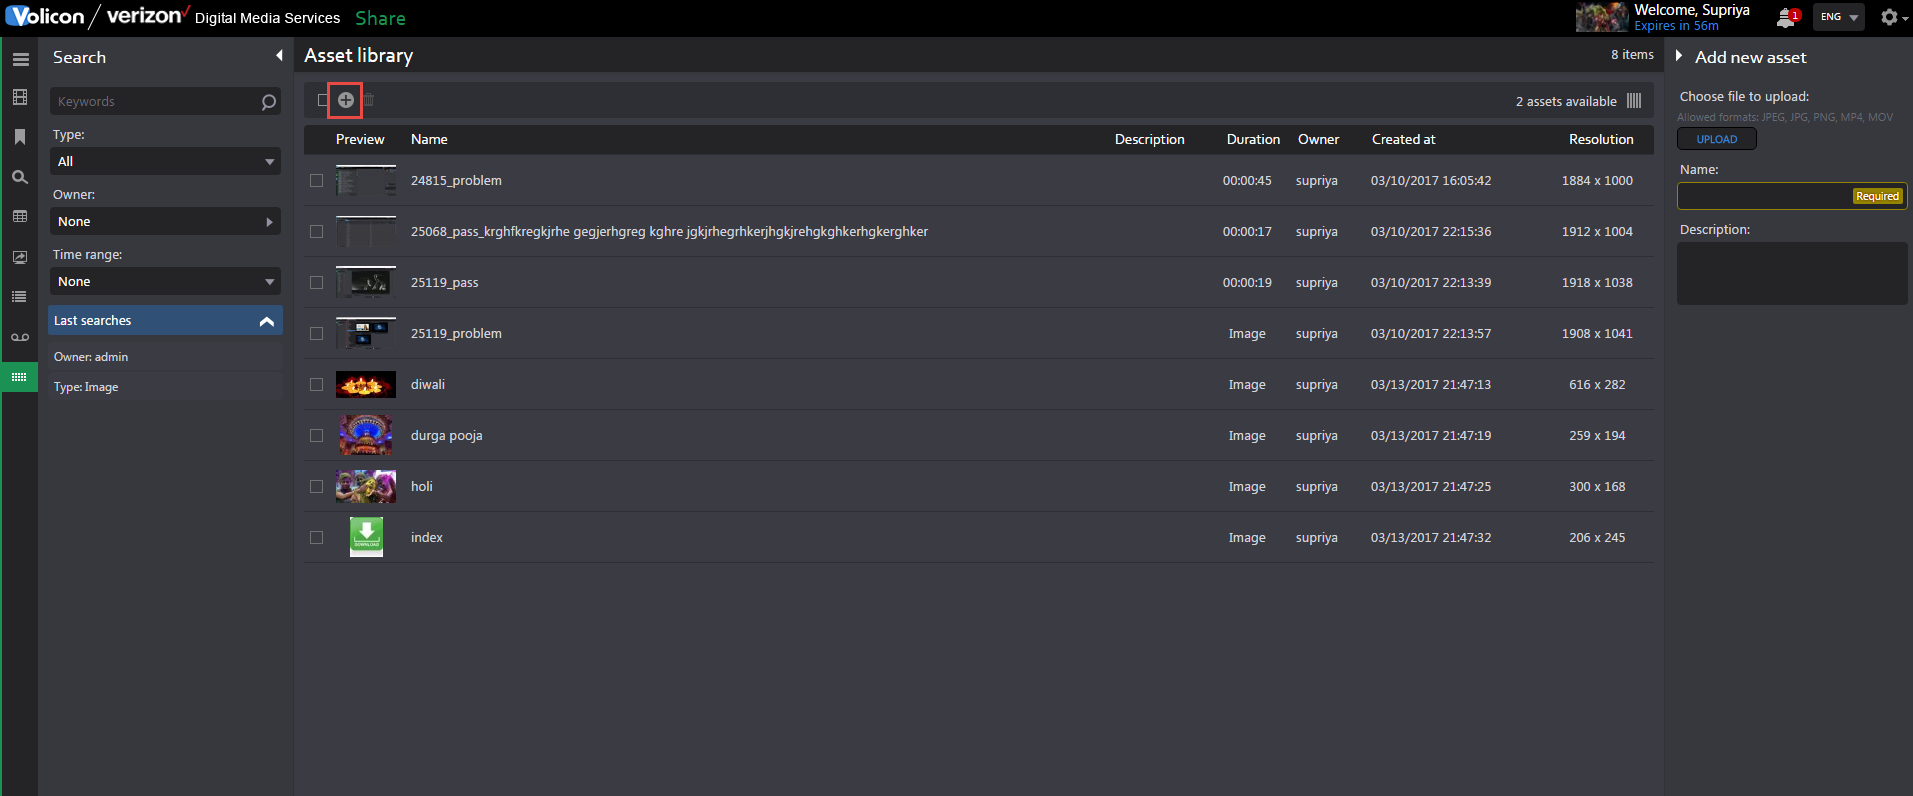
From the popup that appears, select a file (video/image) from the folder structure. By default, name of the Asset is same as the uploaded file name.
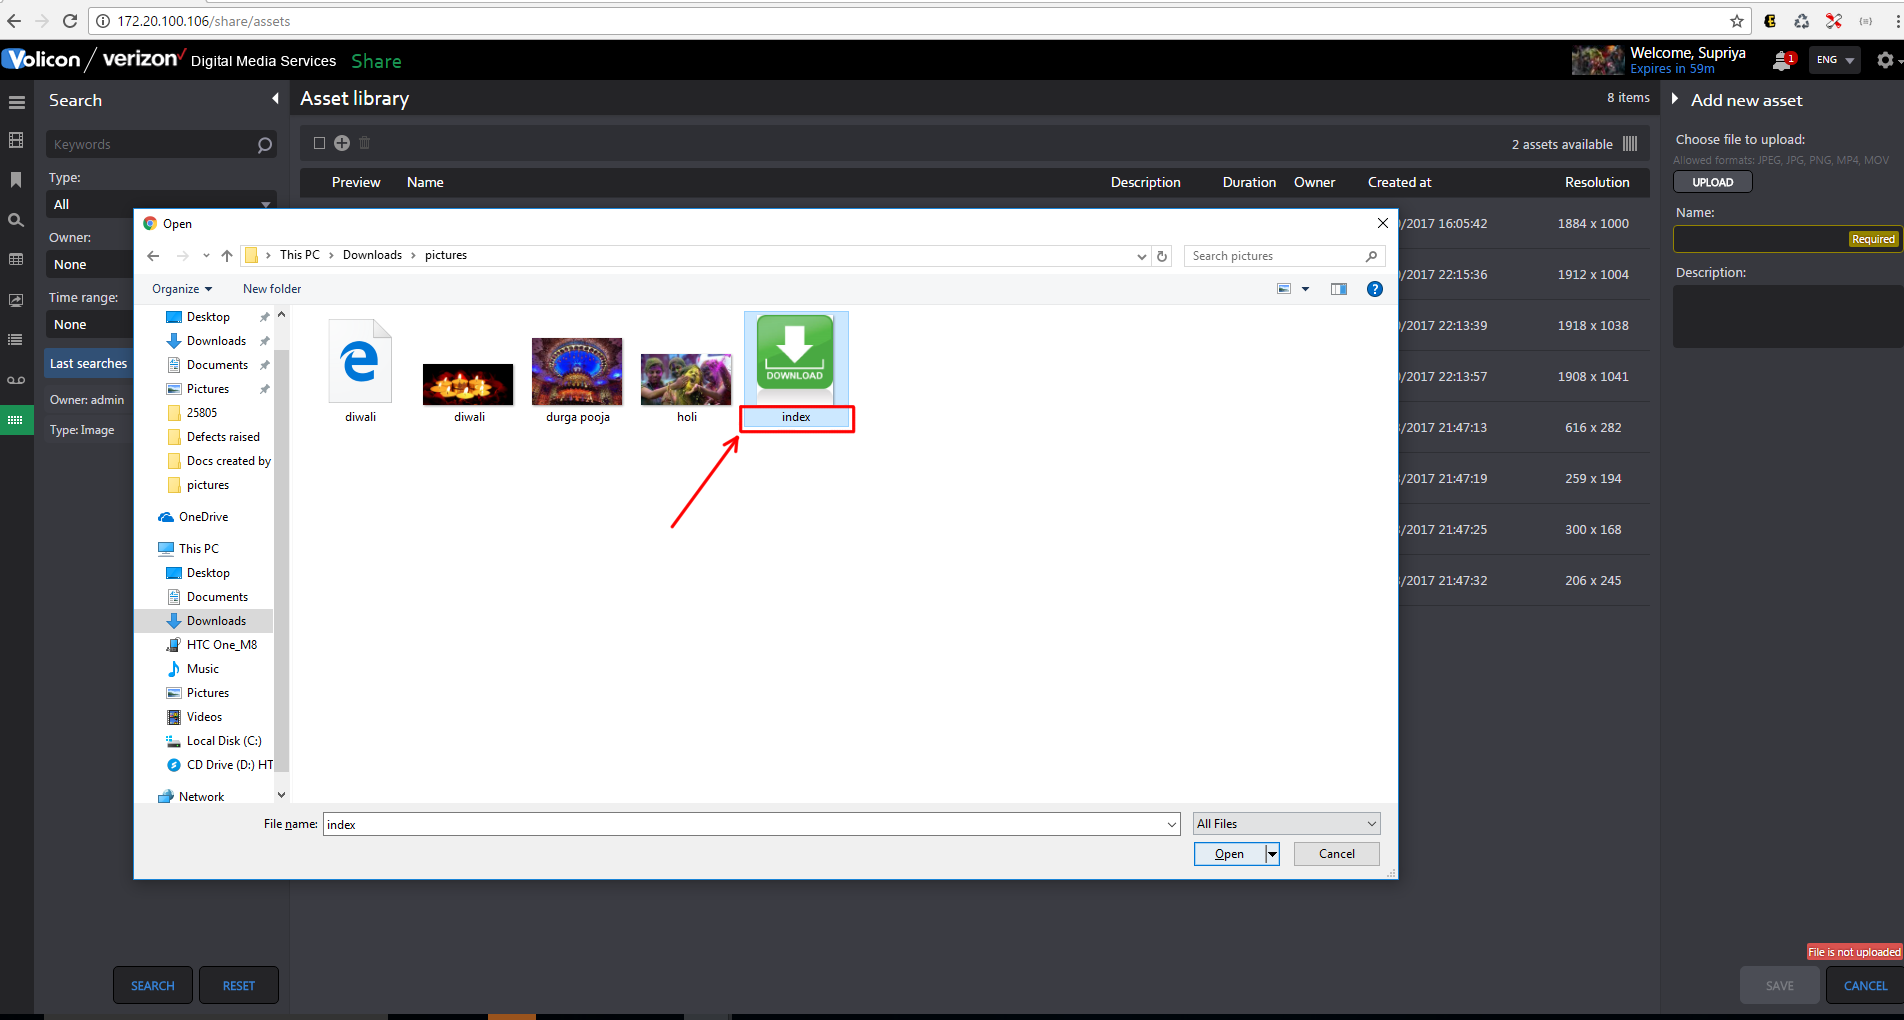
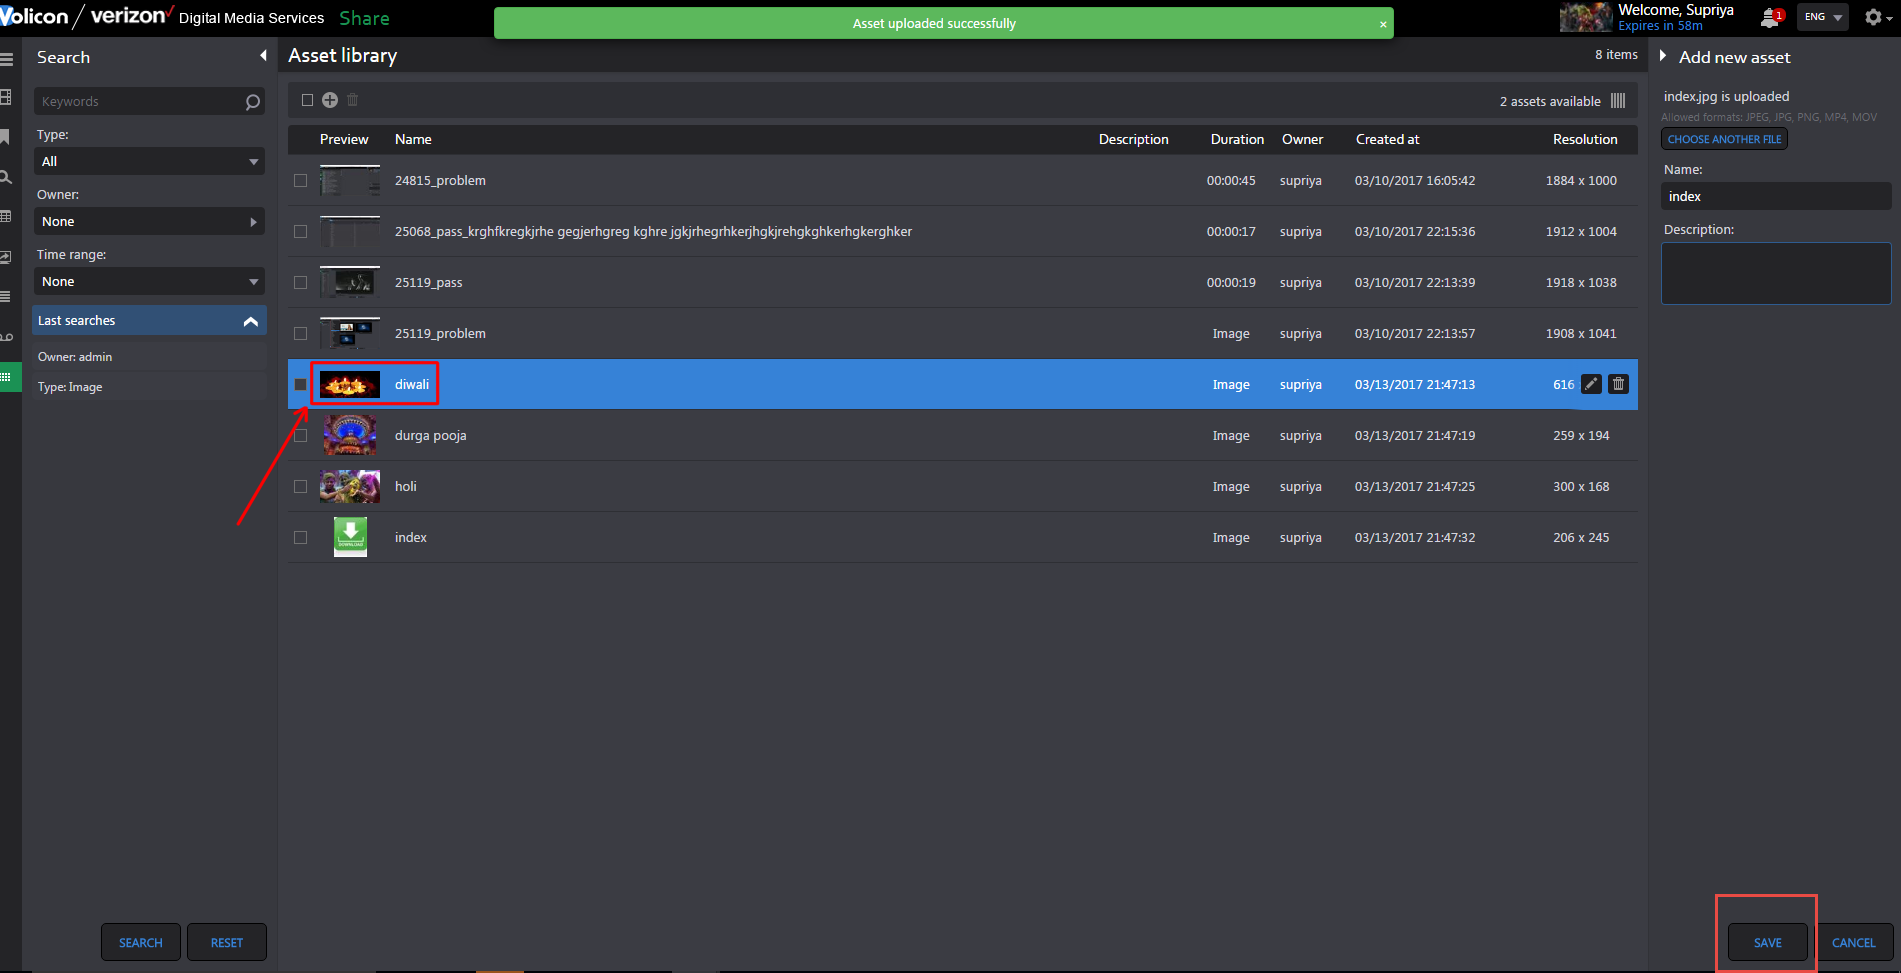
Click on the “Save” button and a successful “Asset saved” message appears.
Each asset will have properties such as name/description/duration/Owner/Created at and Resolution.
Note
Image Asset types will have “Image” mentioned in “Duration” column
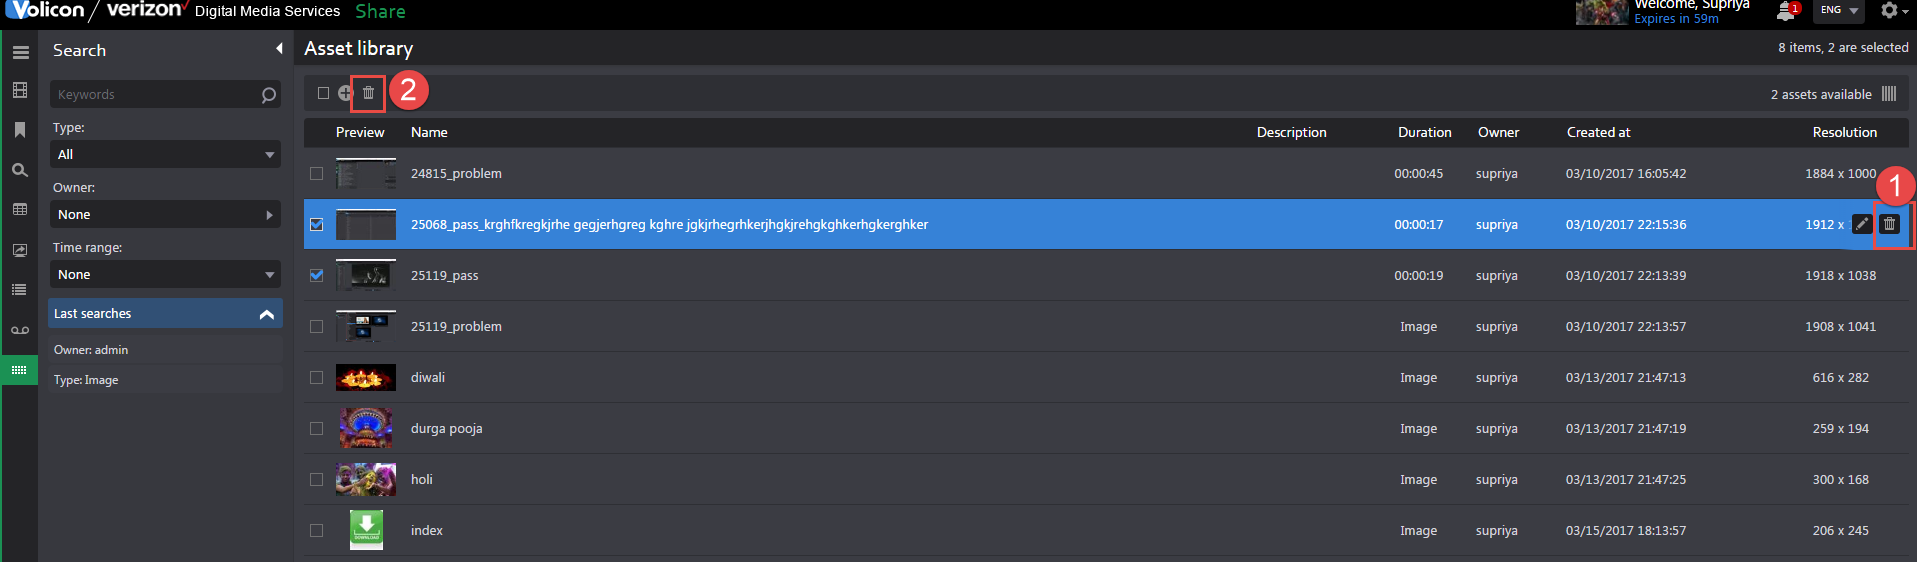
Delete Assets
Users can delete Asset in two ways:
By clicking on Delete button that appears on the asset when user hovers mouse.
By selecting multiple Assets and clicking on “Delete All” button on the menu
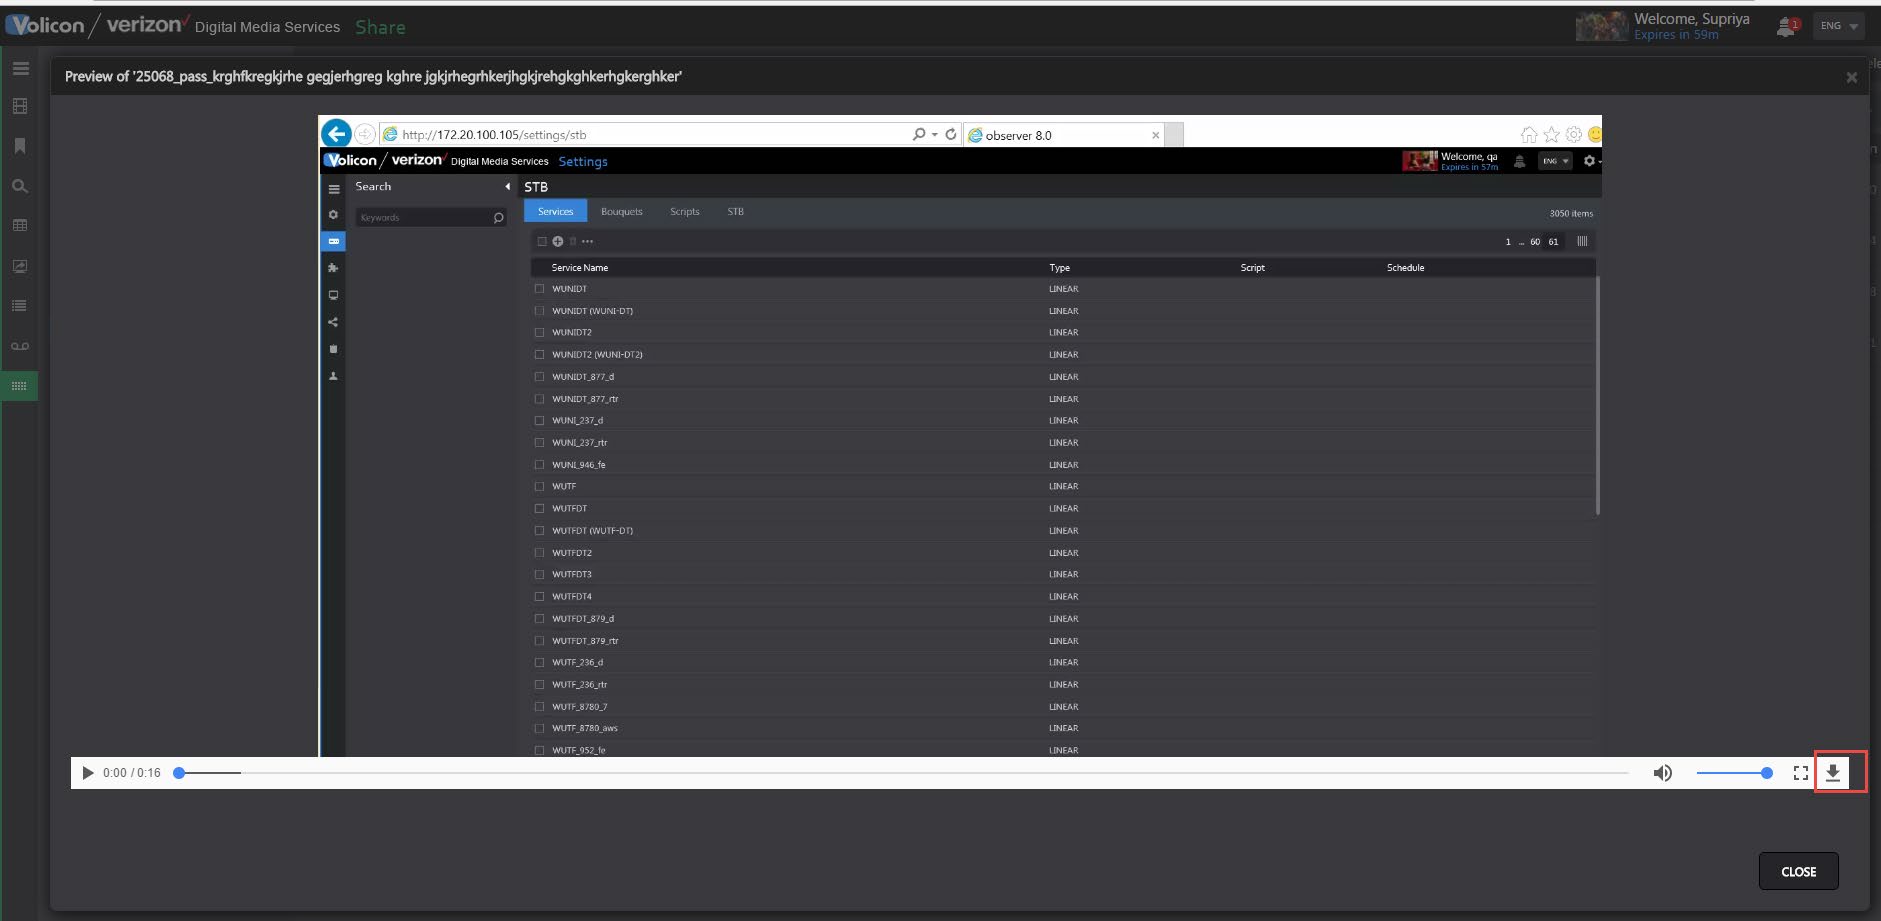
Preview Asset
Users can preview the asset by clicking on Asset’s thumbnail as shown in the screenshots below.
Note
In case of Video asset, users get a download button too to save the video.
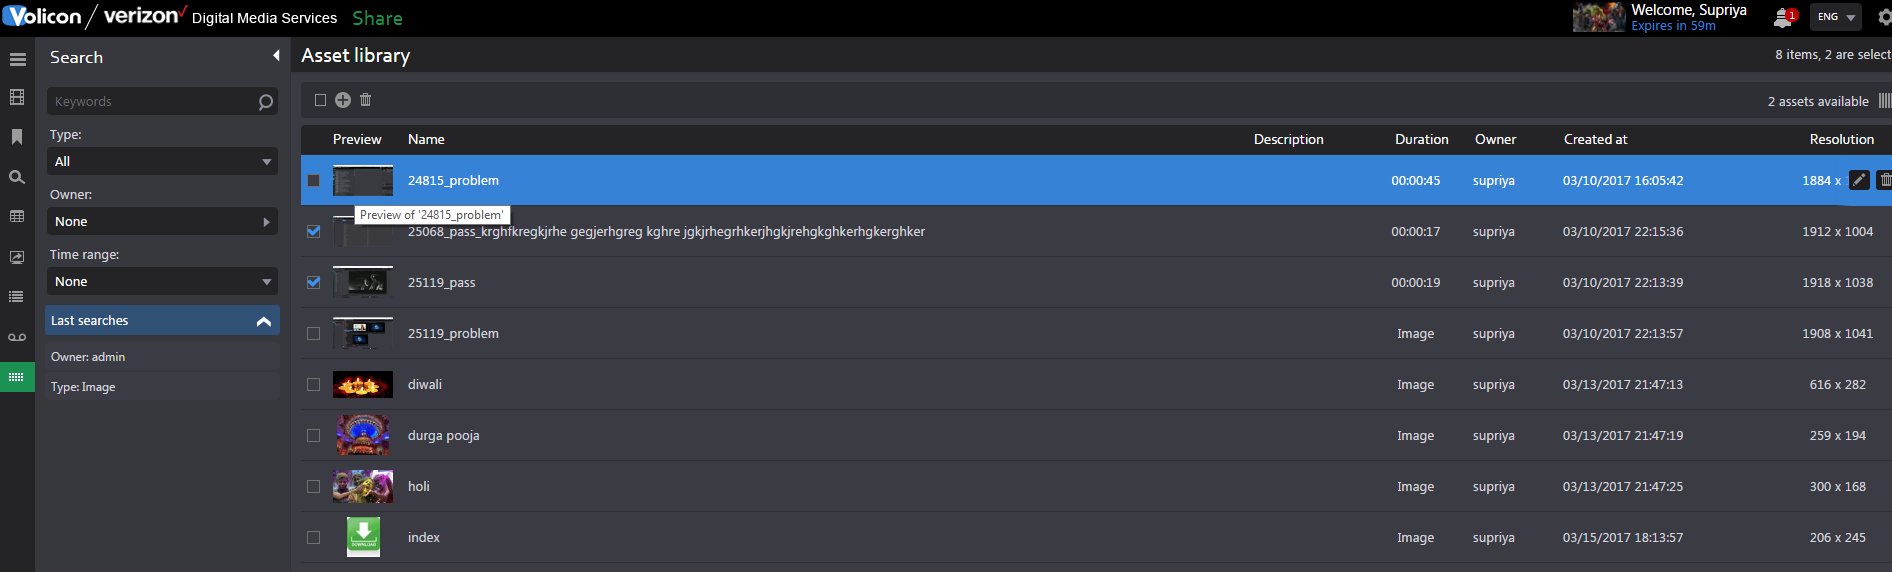
Editing Asset
Click on the Edit button, which appears when user hovers mouse over Asset.
Users will be able to change description and name of the Asset but not the file itself.
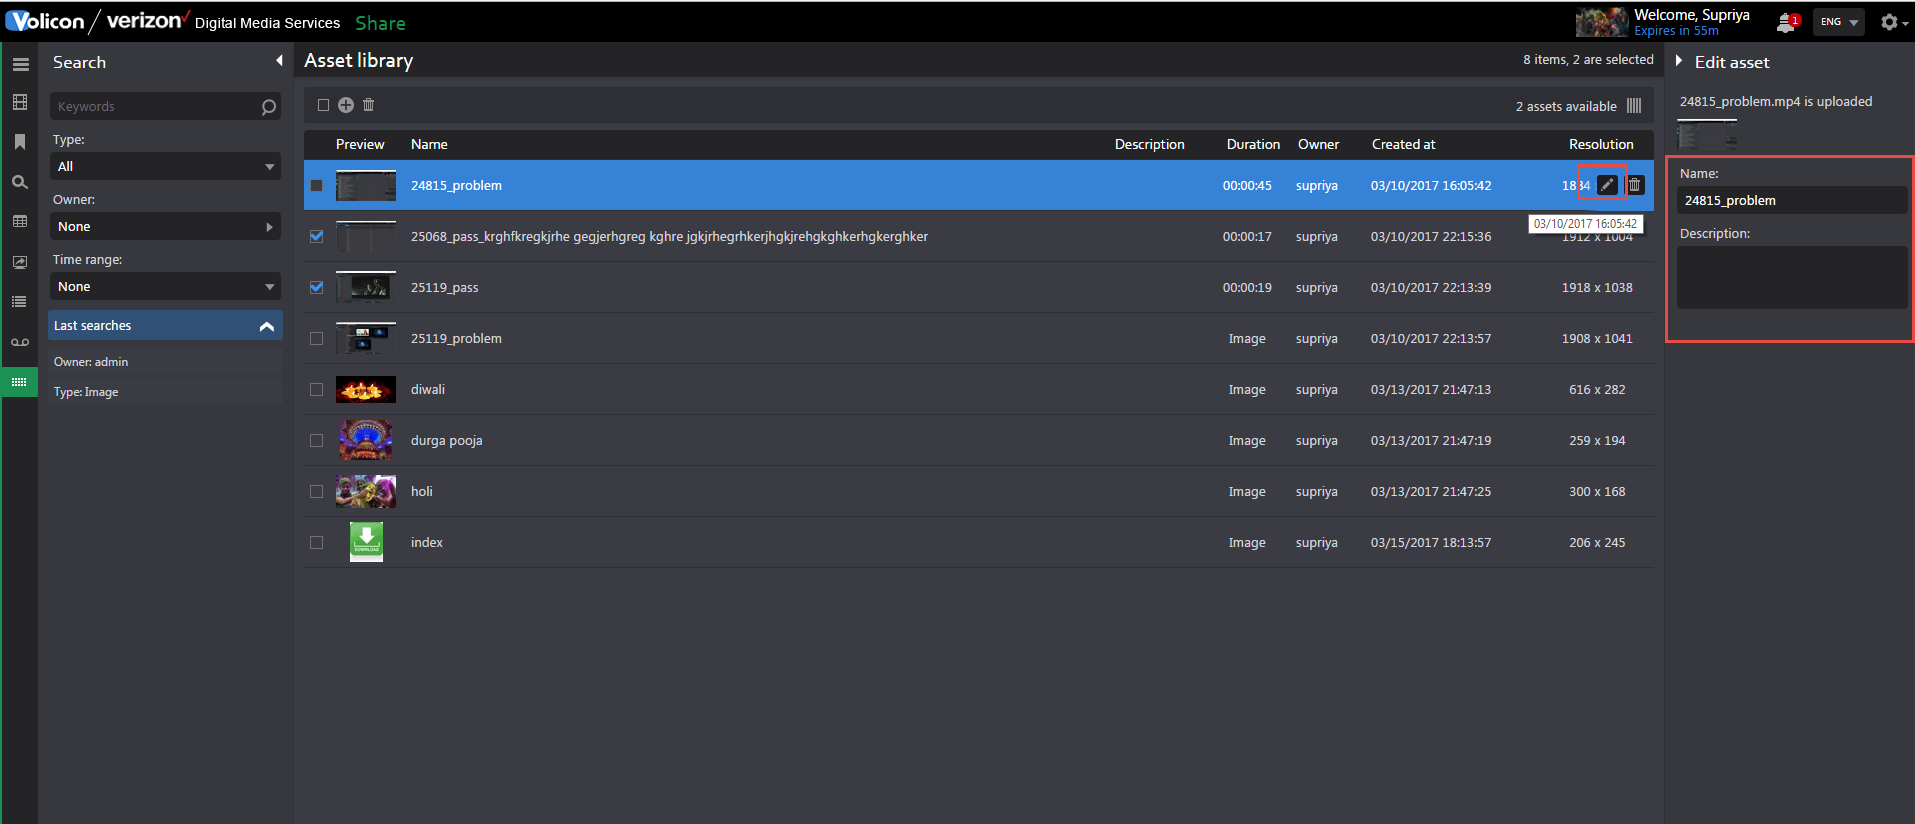
Filter Asset
Users can filter Assets based on the following:
Keyword – Records having searched keyword in the Name column will be returned
Type – Search returns Video asset or Image Asset or both
Owner – Search returns assets created by Owner selected in filter
Time range – Search returns assets created within the selected time range in the filter
Share Light Editor Use
Adding Intro/Outro to clip
To add an Intro/Outro, create a clip and click the “Share” button it.
From the Share page, click on the “LIGHT EDITOR” button as shown in the screenshot
below.
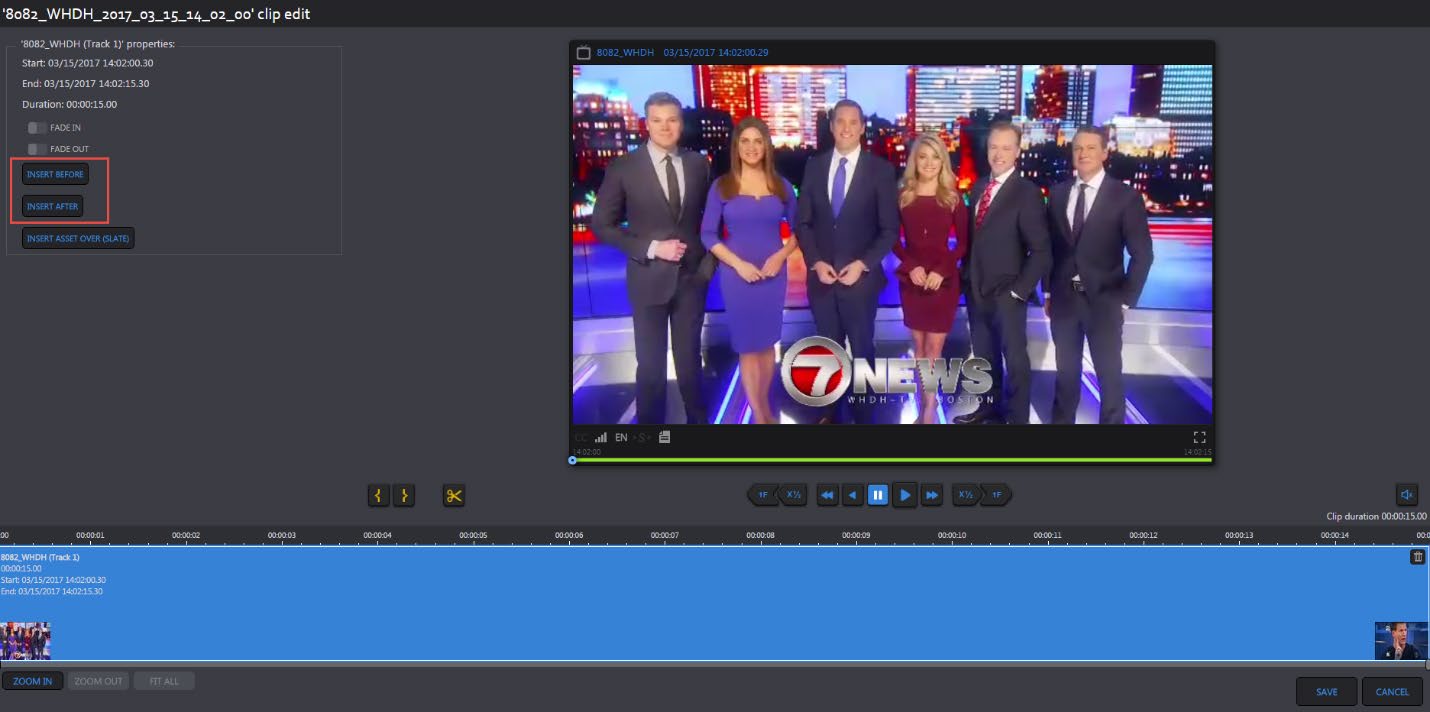
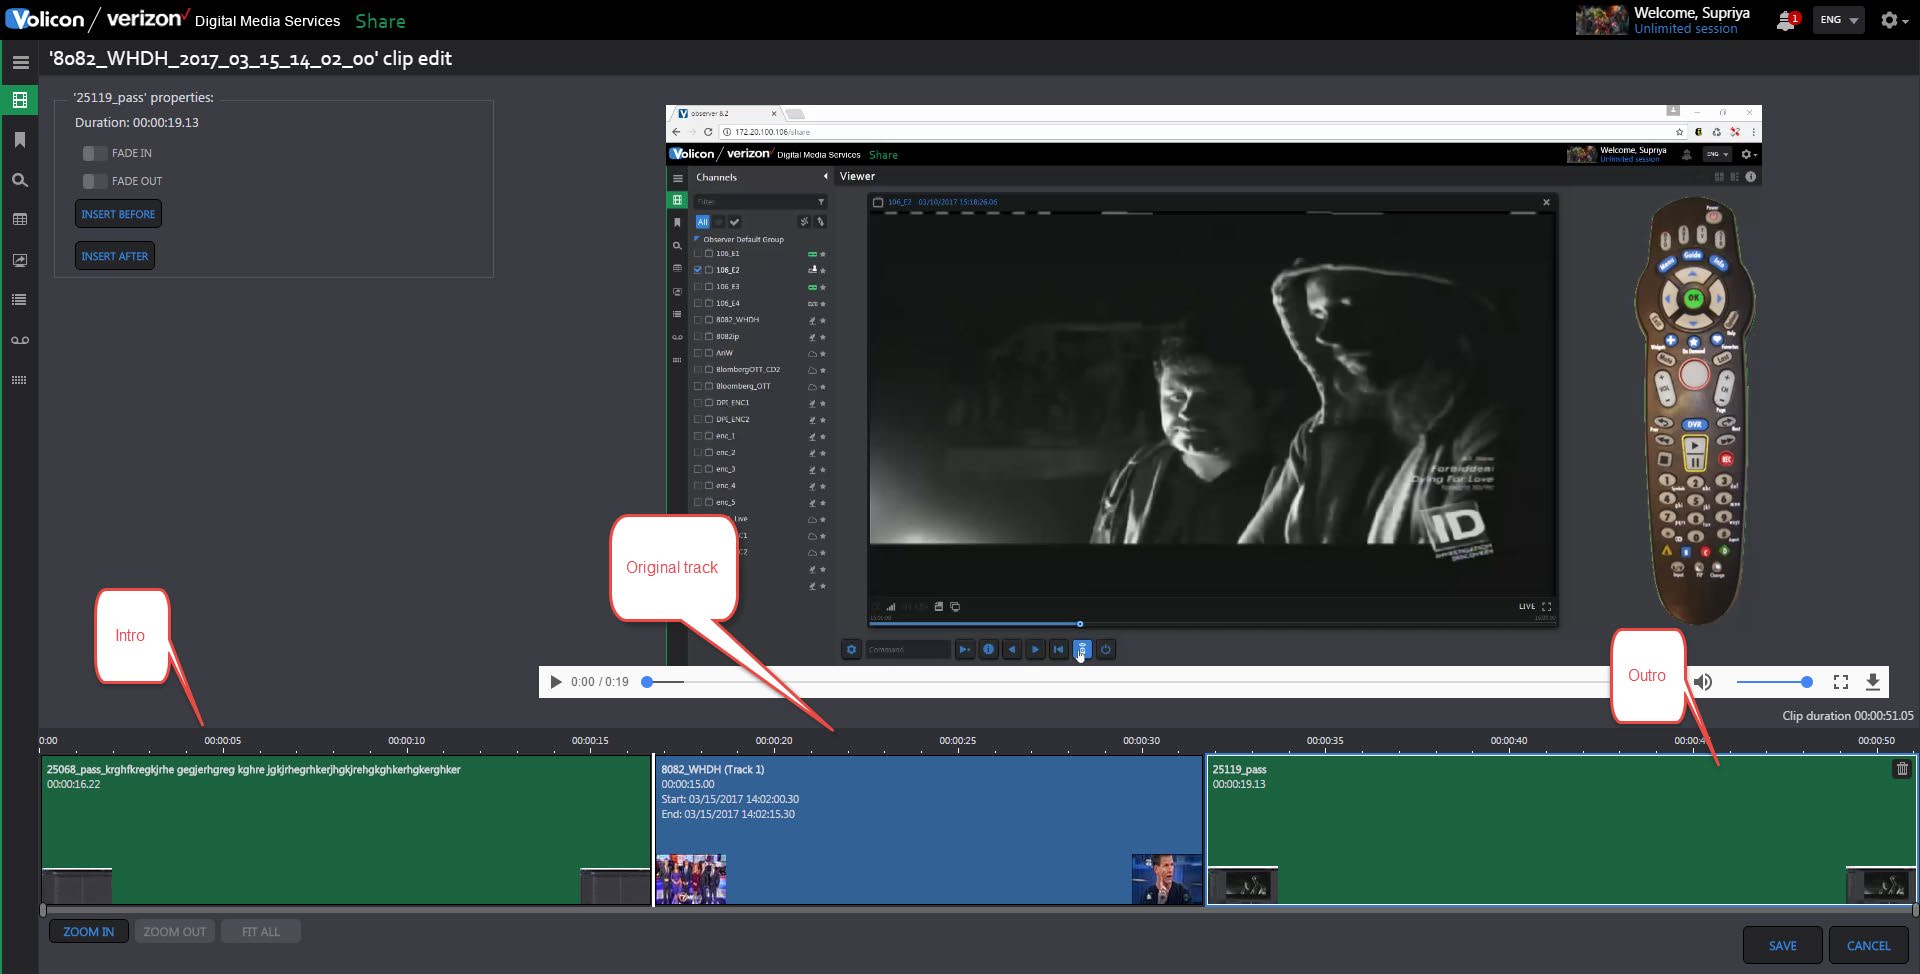
This brings you to the SLE page
From there, to insert an Intro, click on “Insert Before” and to insert an Outro, click on “Insert After”
A panel will pop up to select the Asset to be inserted as either an Intro or Outro. Notice that it displays Assets of “Video” type that are defined on Asset library page.
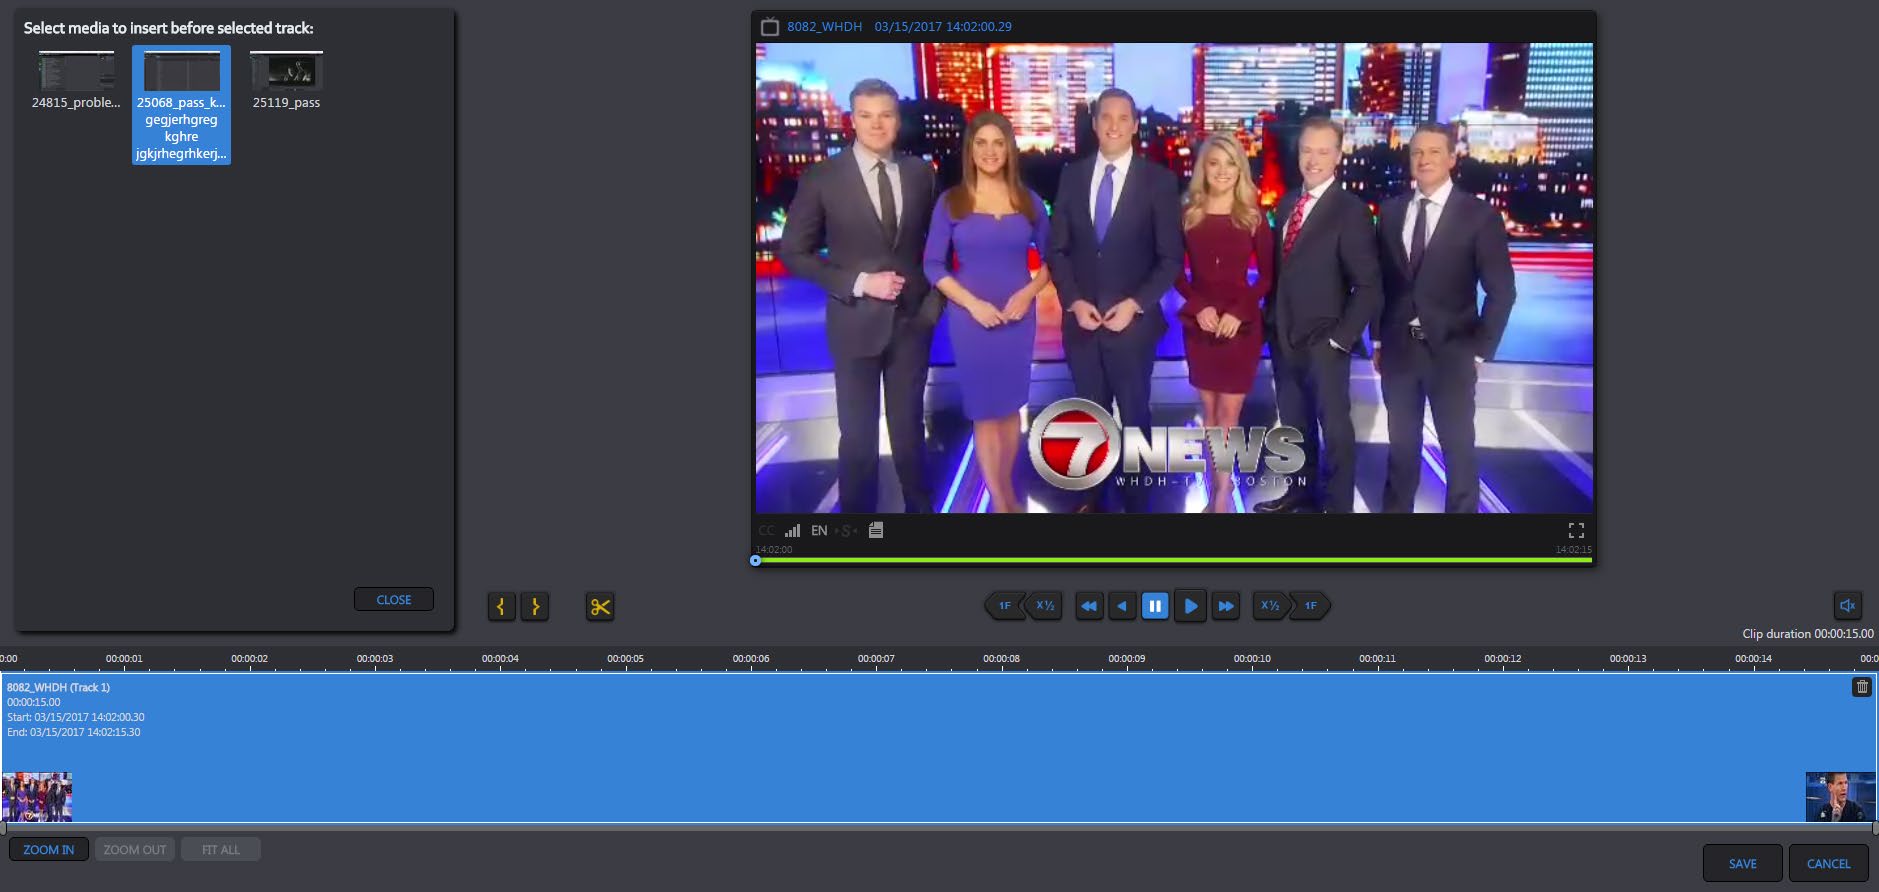
After the user selects the desired Asset to use, it is displayed in Front and back of the clip in a different color to differentiate with the original track. Please see the screenshot below for reference.
Splicing the track
A track can be divided into multiple tracks by using the splicing button below the player.
Click on the desired time in track pane at the bottom part of the page and then click on the “Splice” button to divide the track. Please see the screenshot below for reference.

After splicing, the user will see multiple tracks on the Share page, instead of just one.
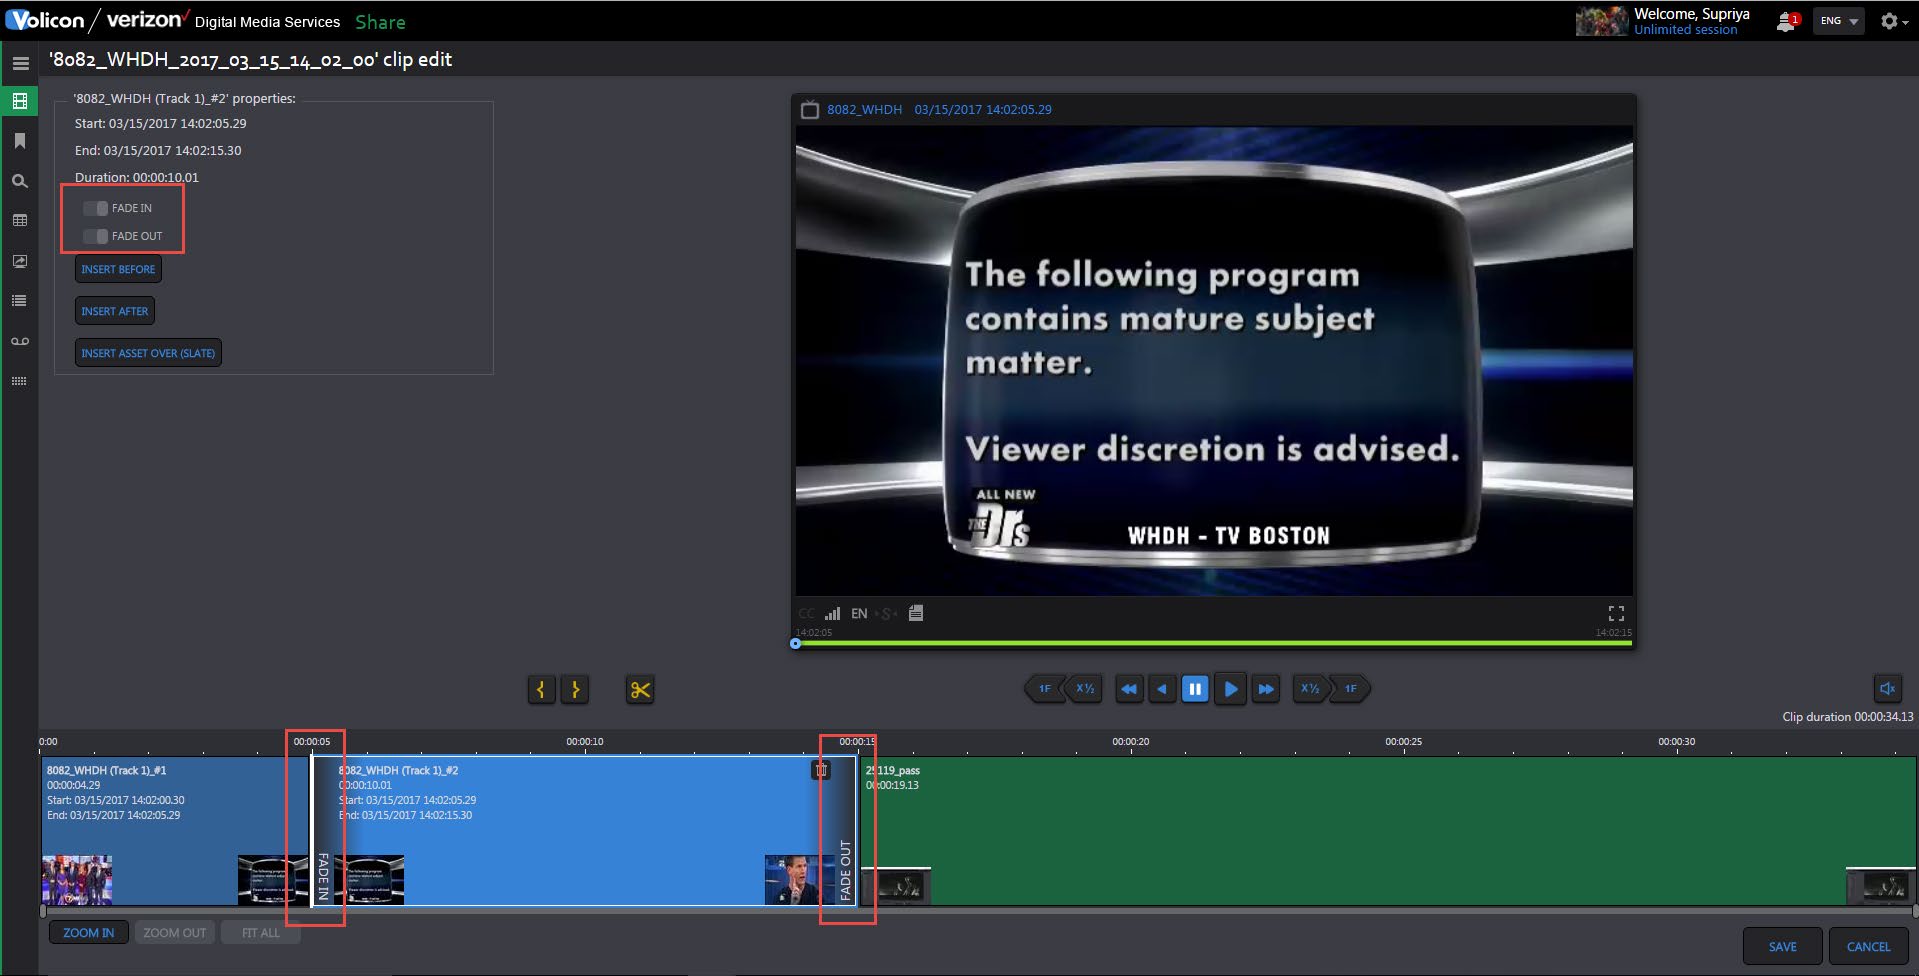
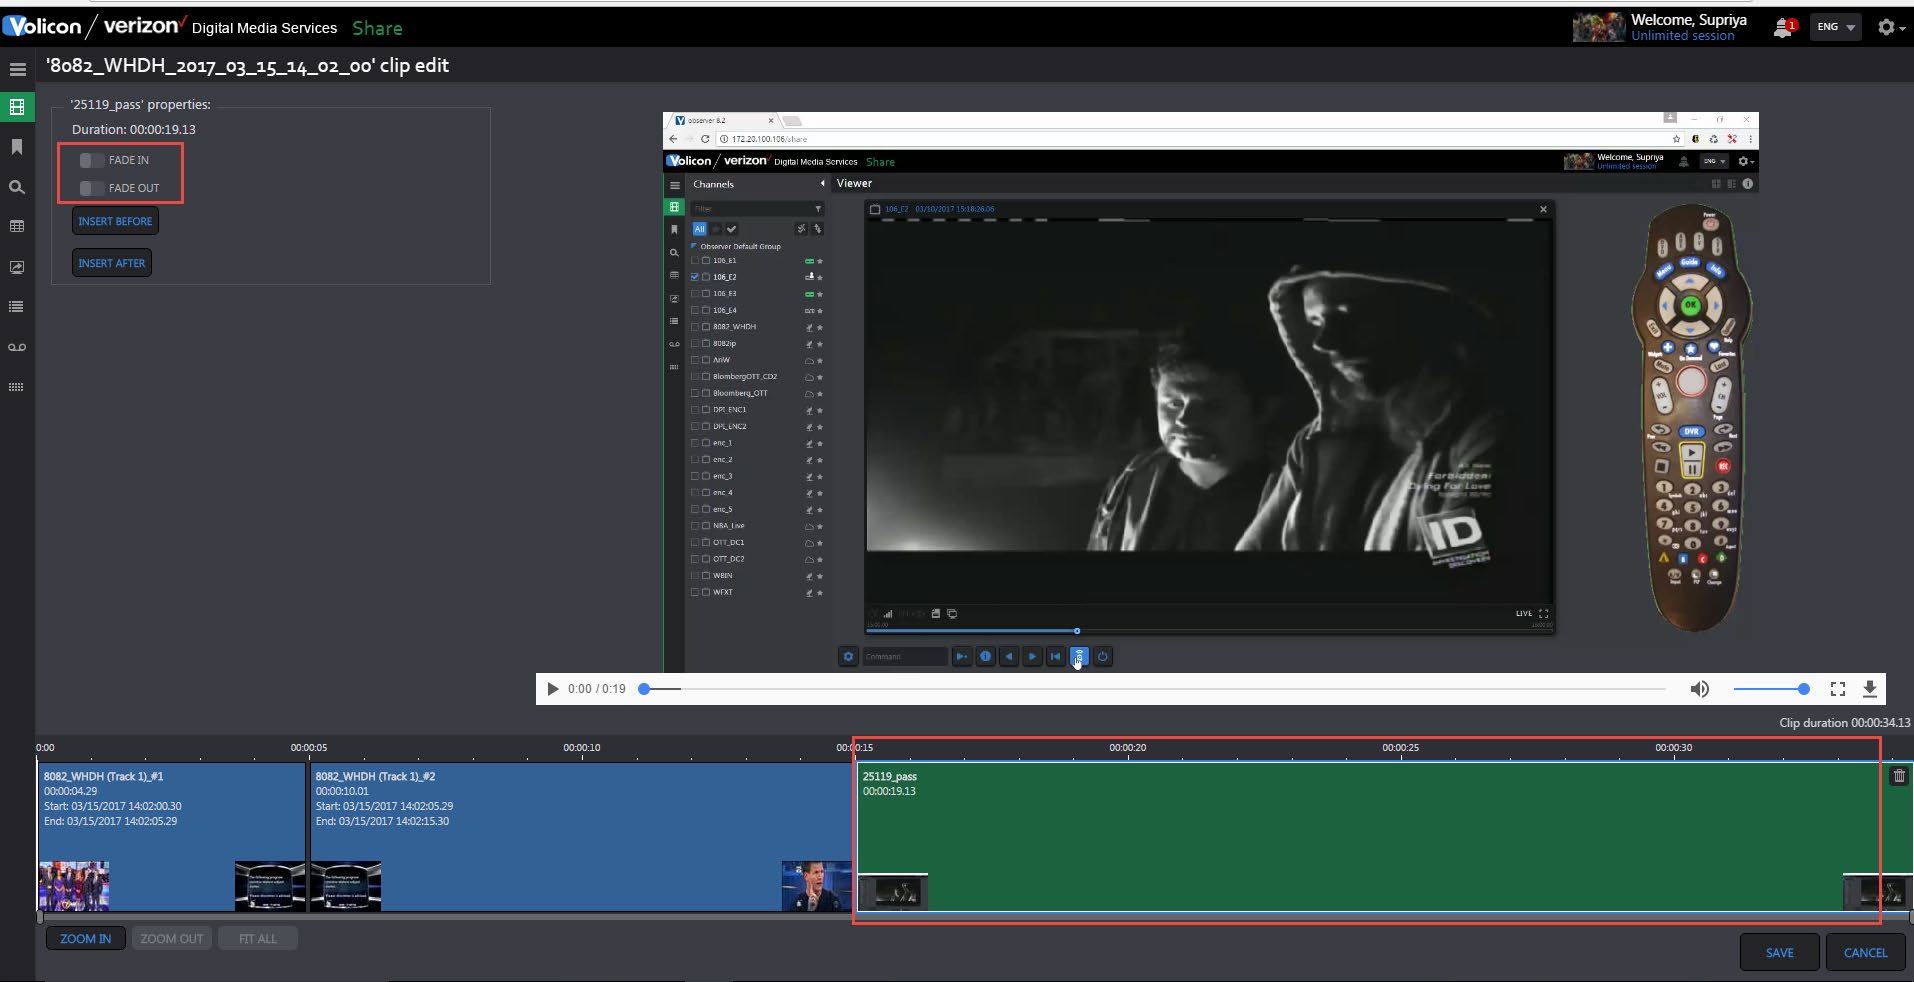
Adding Fade In/Fade Out
Fade In/Fade Out is used in the case of sharing multiple tracks.
To differentiate between multiple tracks (i.e. when the first track ended and the next track begins), black frames can be inserted between tracks. The default duration for which these frames are inserted is 2-3 seconds.
To add fading, click on the track and track properties will start appearing on the panel.
Click on “Fade In” to add black frames at the start of track and “Fade Out” to add black frames at the end of track. Please see the screenshot below for reference.
Adding Slate
To insert a Slate Asset on the track, select the track and click on “Insert Asset over (Slate)”.
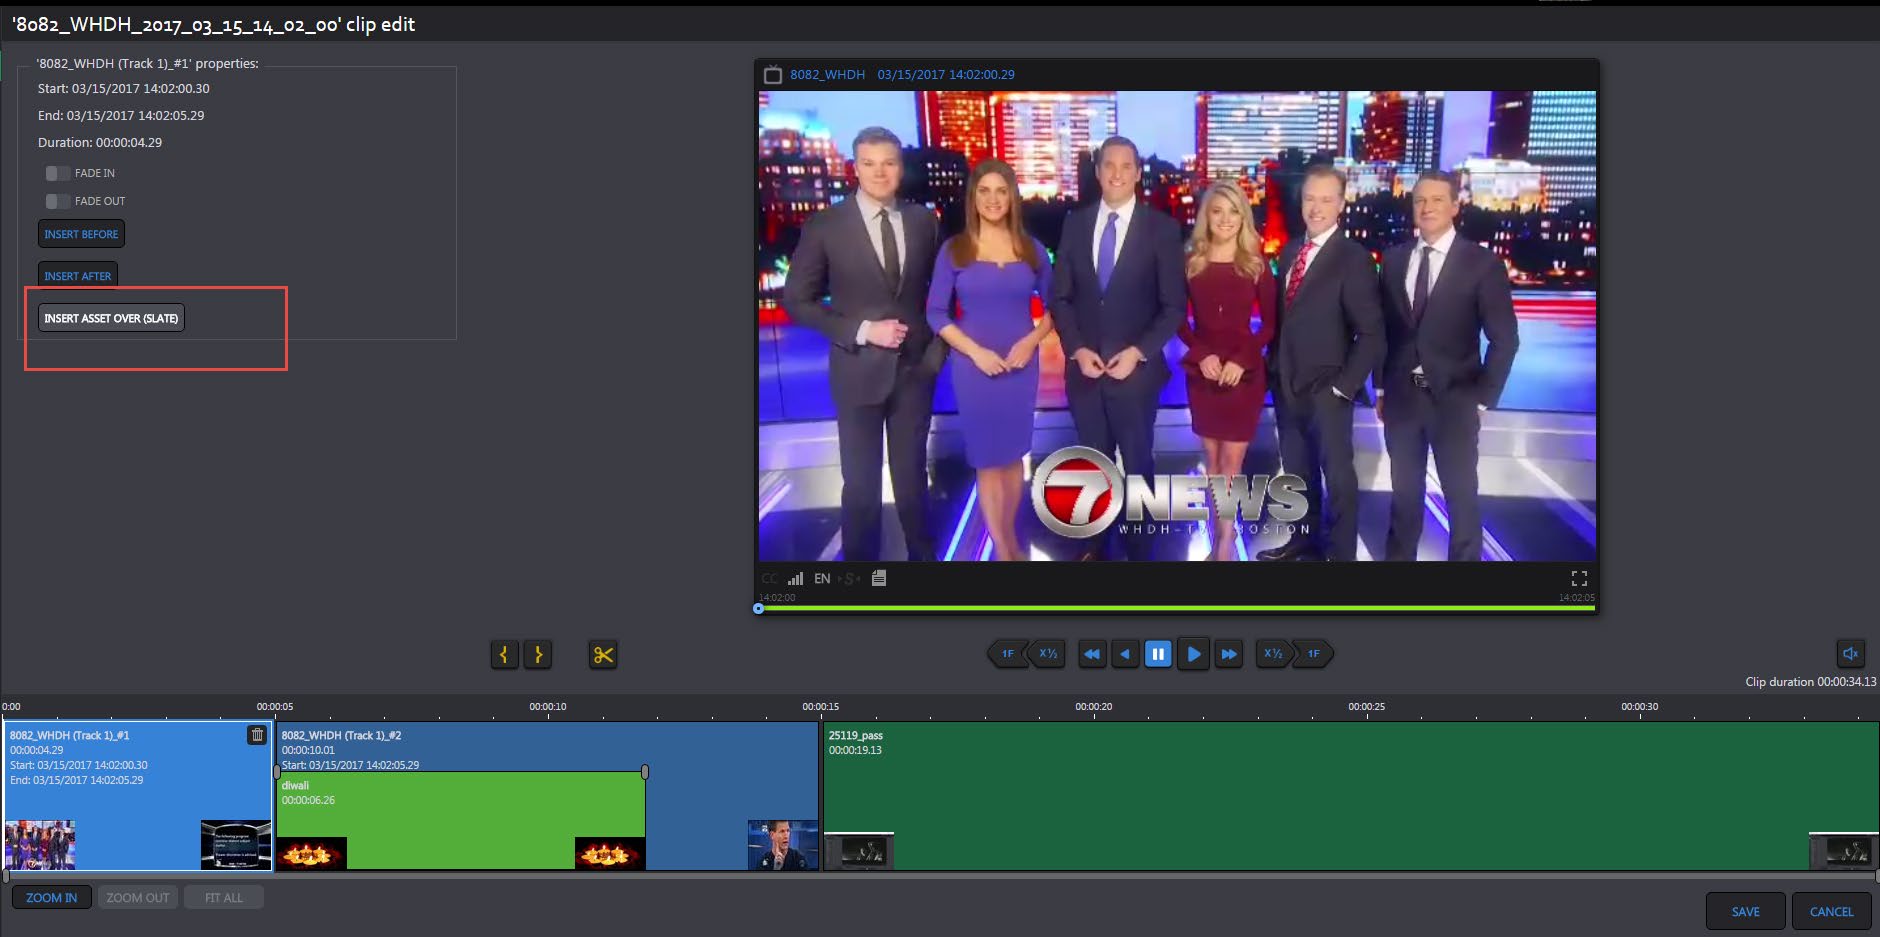
A panel will appear with the list of “Image” Assets defined in Asset library page that can be used for Slate.
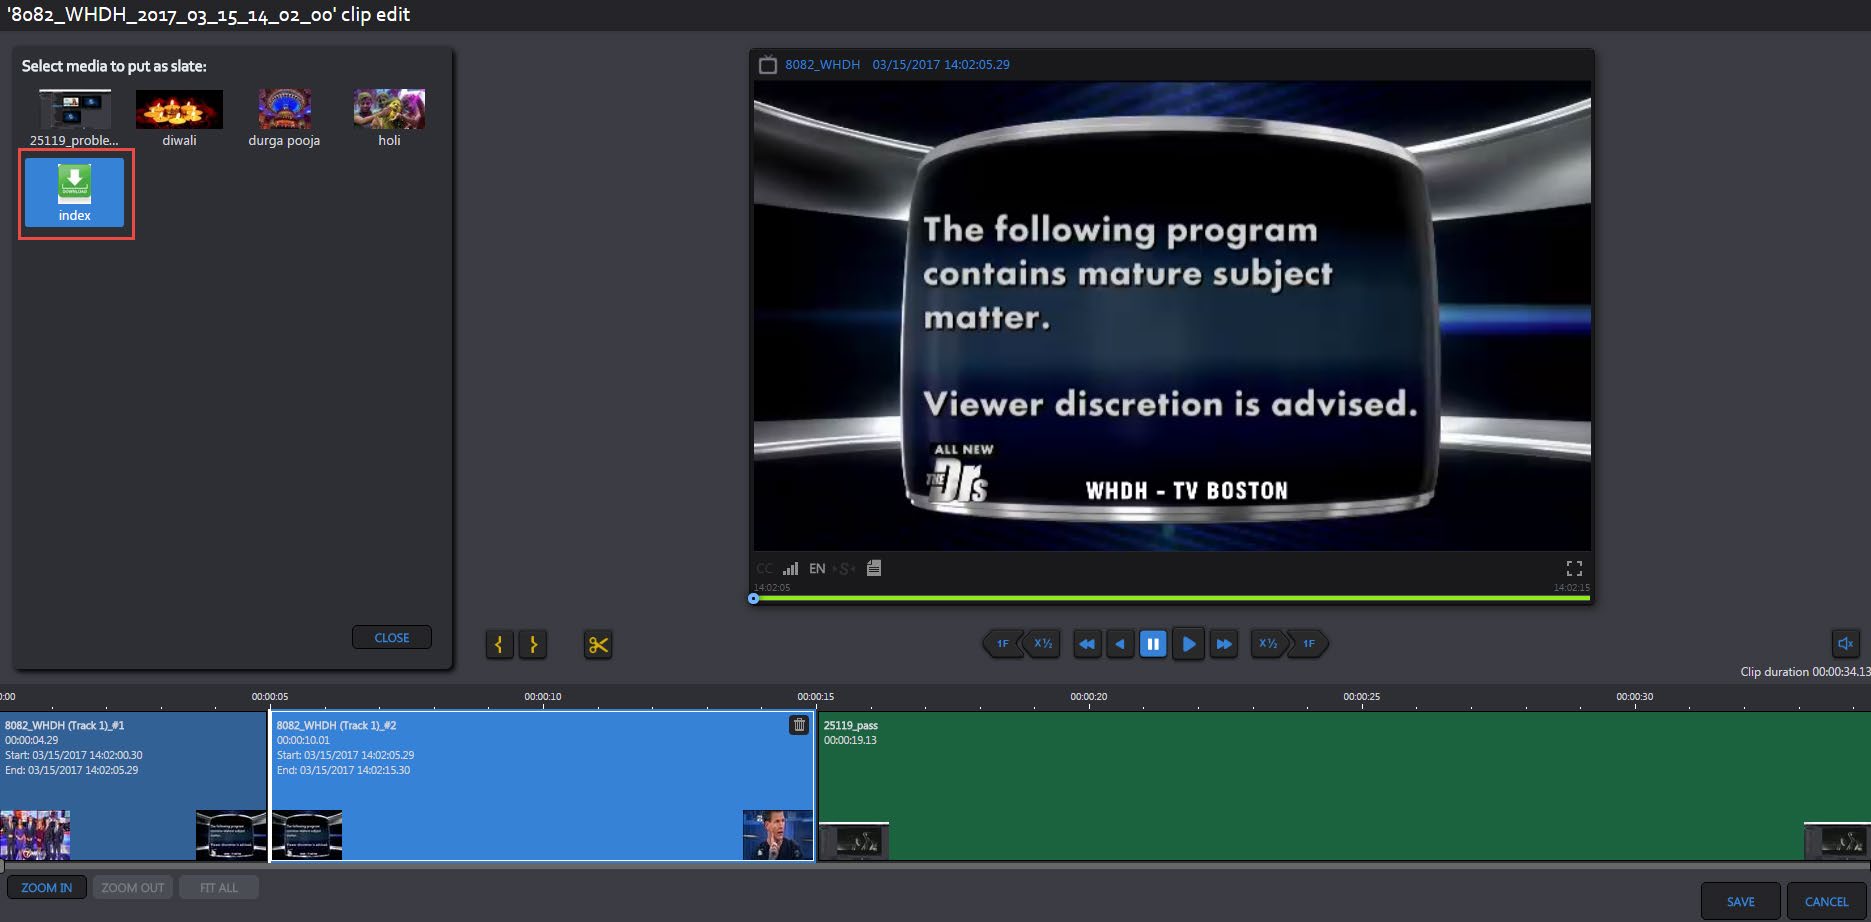
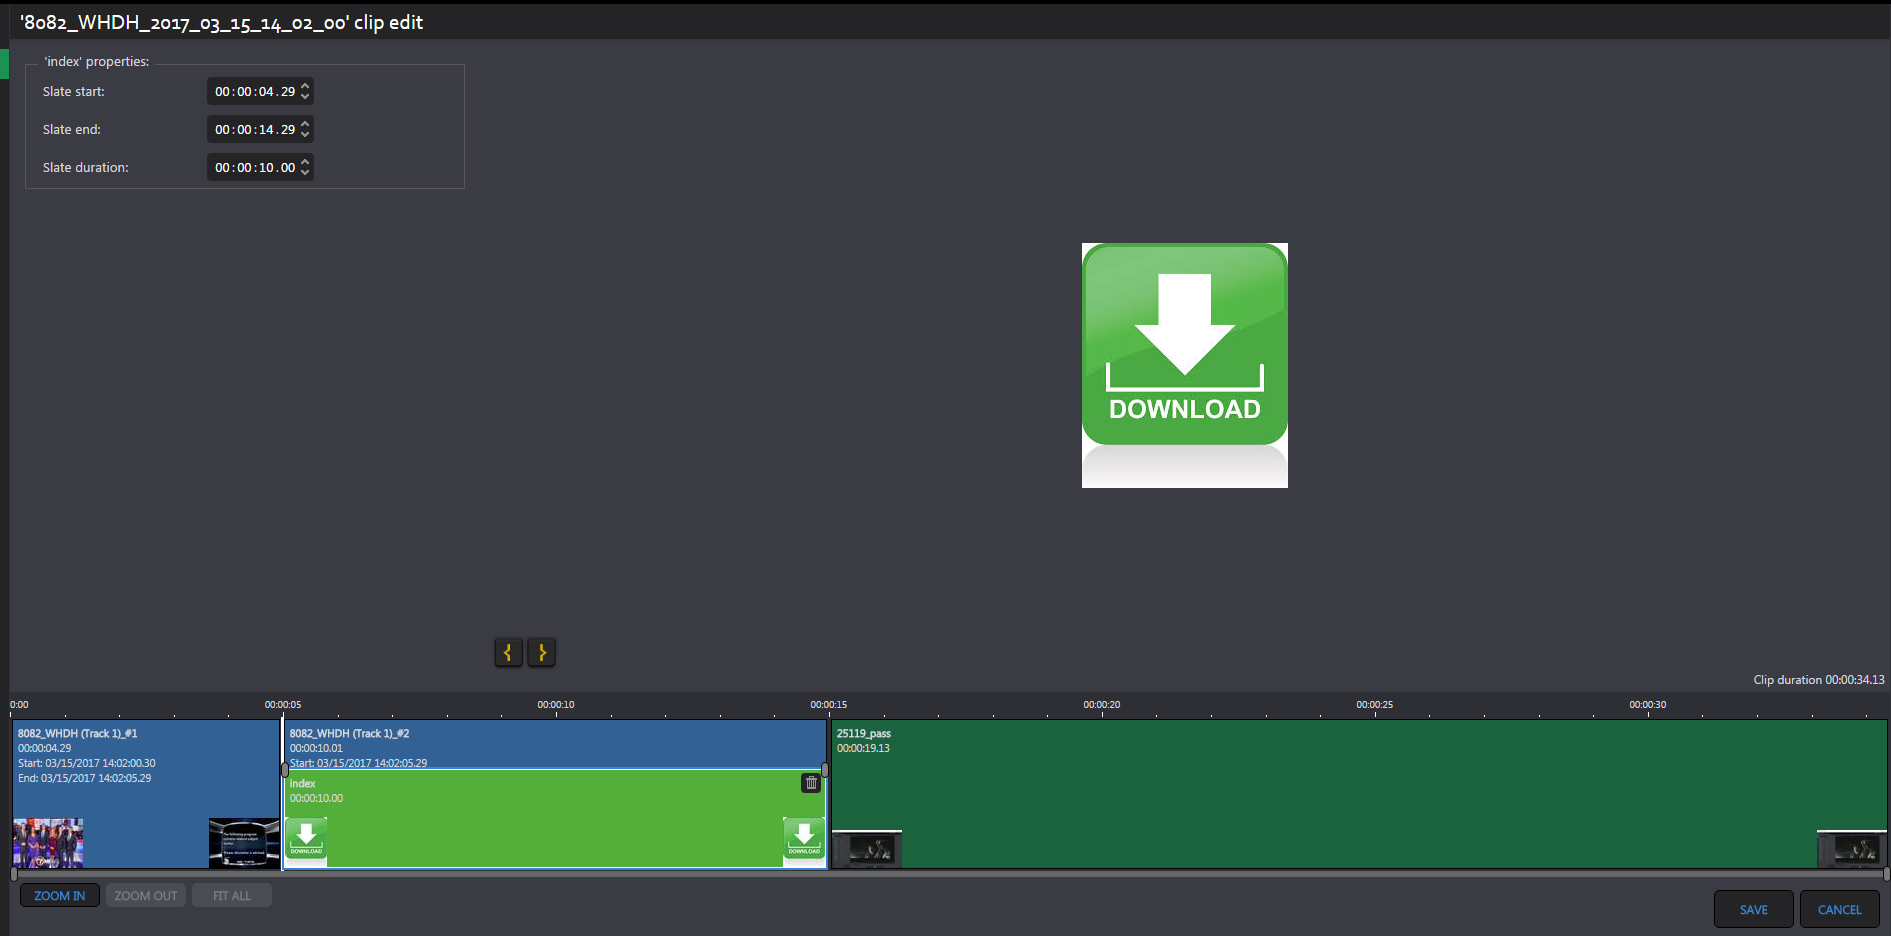
Select any of these “Image” Assets to be added as Slate.
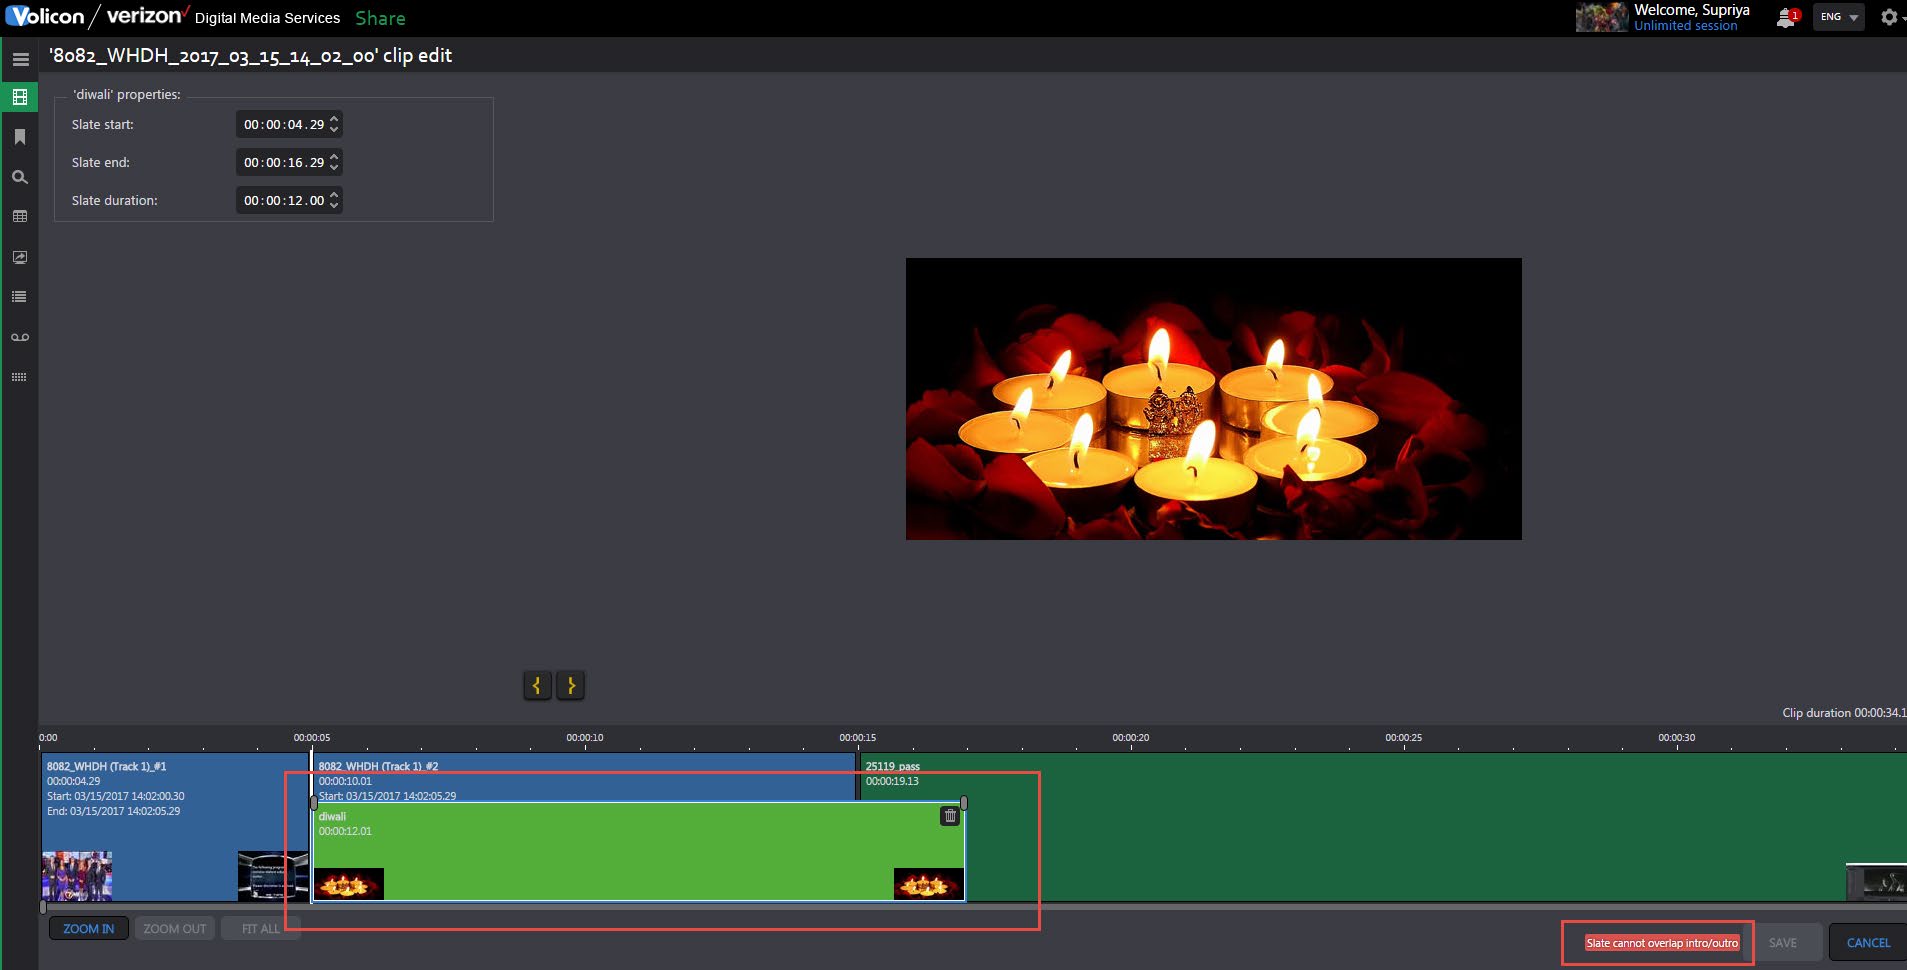
Once selected, the user can change the start time, end time and duration of Slate manually.
NOTES**:
Fade-In/Fade-Out can be added to Intro/Outro track as well.
Slates cannot overlap Intro/Outro but they can overlap multiple tracks – spliced or otherwise.
Any Asset or track can be deleted by clicking on Delete button which appears over each asset.
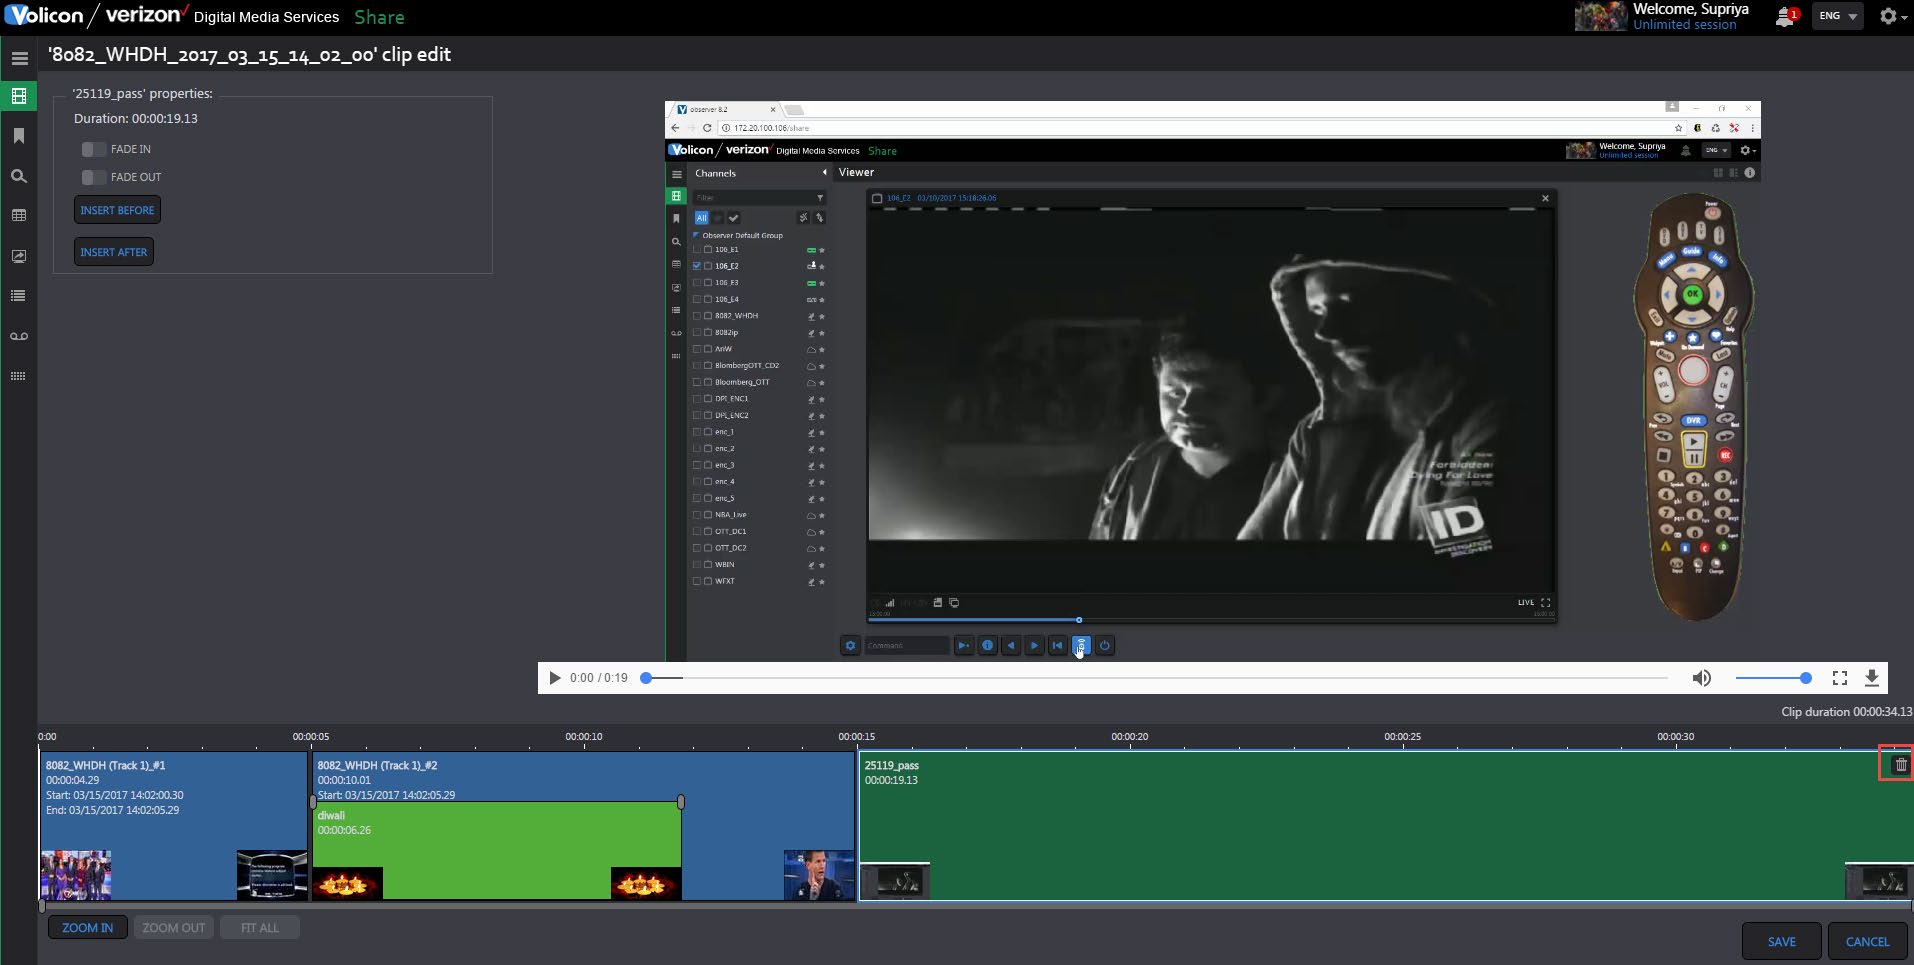
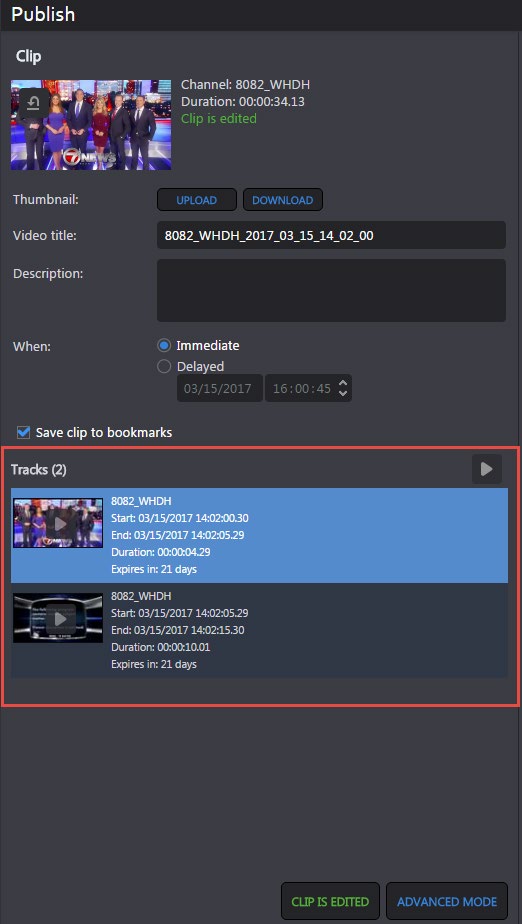
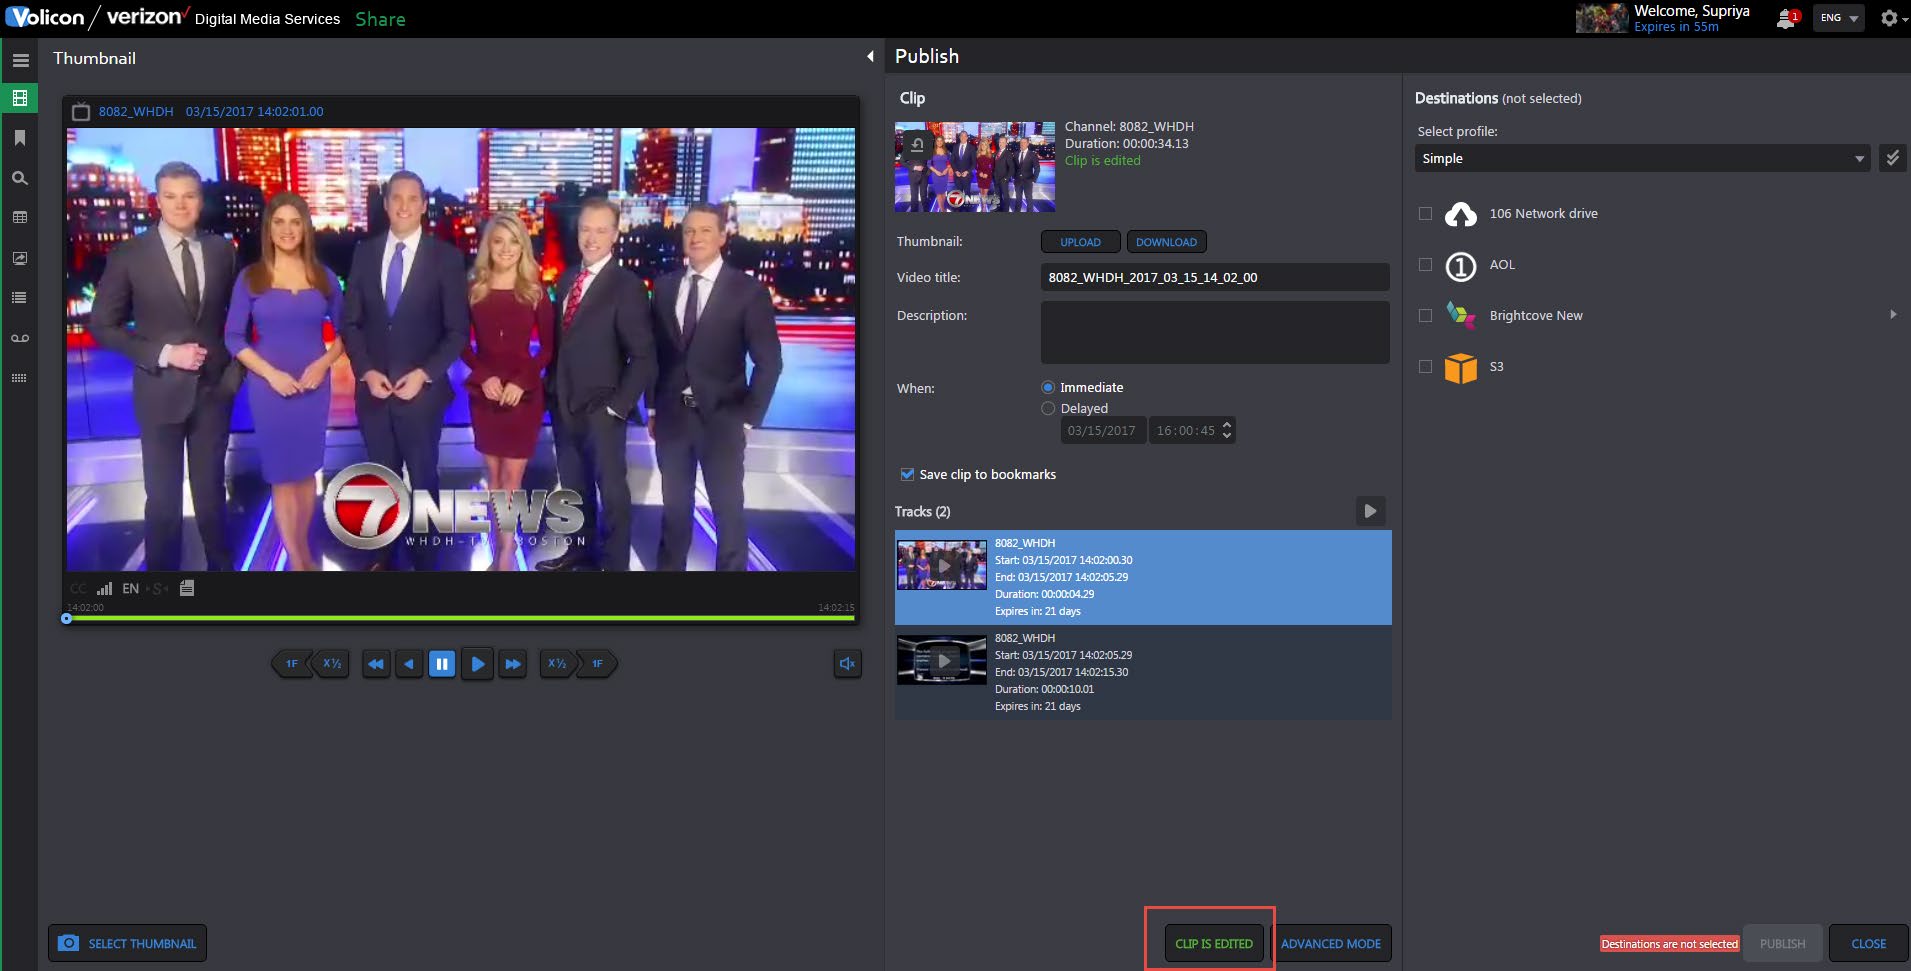
If user edits a clip using Light Editor, the button is renamed on Share page to “CLIP IS EDITED”
Multi Share
Overview:
Multi Share allows users to pick several destinations from several different profiles for specific Assets. The system will trigger several jobs, one job per publish profile.
When sharing, select the desired destinations
Notice that the tag icon appears next to the publish profiles and an indication to number of destinations and publish profiles will be presented next to “Destinations”:
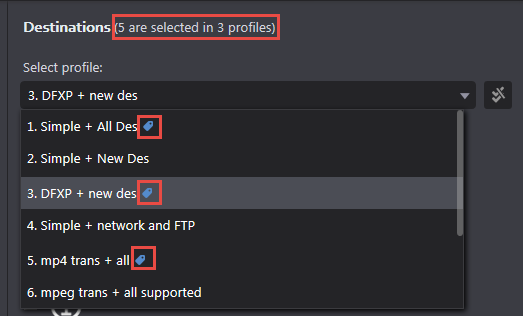
In order to remove the tag from a publish profile, the destinations selected under this profile need to be deselected.
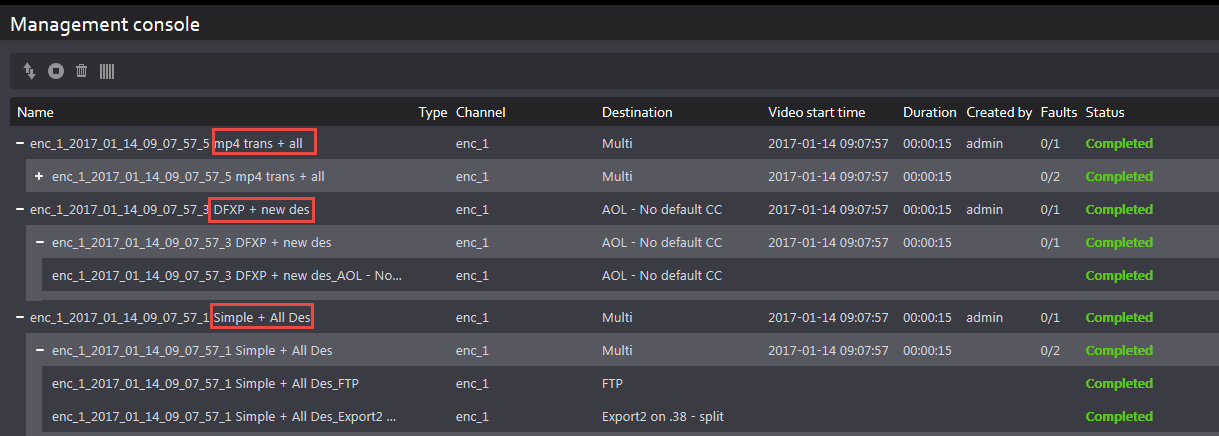
The publishing progress will be presented as following:
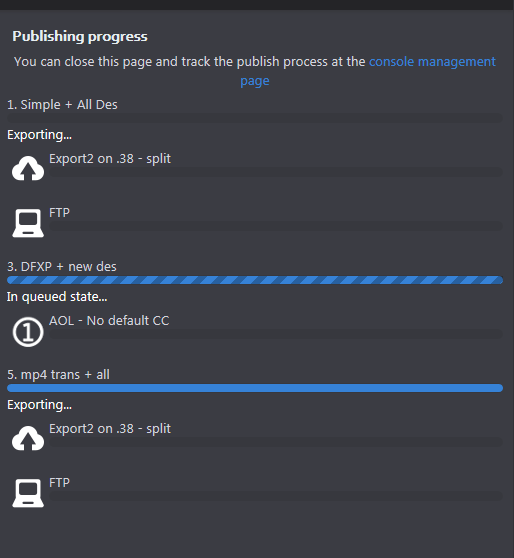
In the management console - a job per publish profile is displayed: