Scout Network Configuration
Now that the system has been installed it is necessary to configure the Scout IP, Scout Computer Name and the CS Hostname/IP. You will need to obtain the “Provision Probe.exe”. This can be achieved by visiting Comcast.Volicon.com from an internet connected PC and downloading the executable. Once downloaded, please transfer the executable to the desktop of the Volicon Scout.
Monitor Setup
Ensure that the Comcast supplied monitor, keyboard, and mouse have been connected to the Comcast supplied KVM switch.
Attach the corresponding cables from the KVM, VGA for the monitor and either PS/2 or USB for the keyboard/mouse to the VGA input and USB input on the back of the Scout as seen in Figure 8.1.1.

Figure 8.1.1. Volicon Scout Rear View – VGA, USB, & PS/2 locations.
Volicon Scout CS Host Configuration
After receiving the “Provision Probe.exe” from Comcast.Volicon.com there should be three icons on the Desktop of the Volicon Scout. Please see Figure 8.2.1 for reference.

Figure 8.2.1. Volicon Scout Desktop.
Double click the “Provision Probe.exe”
A window will popup as shown in Figure 8.2.2. Please make sure that the “NIC” selected is “Local Area Connection 2”
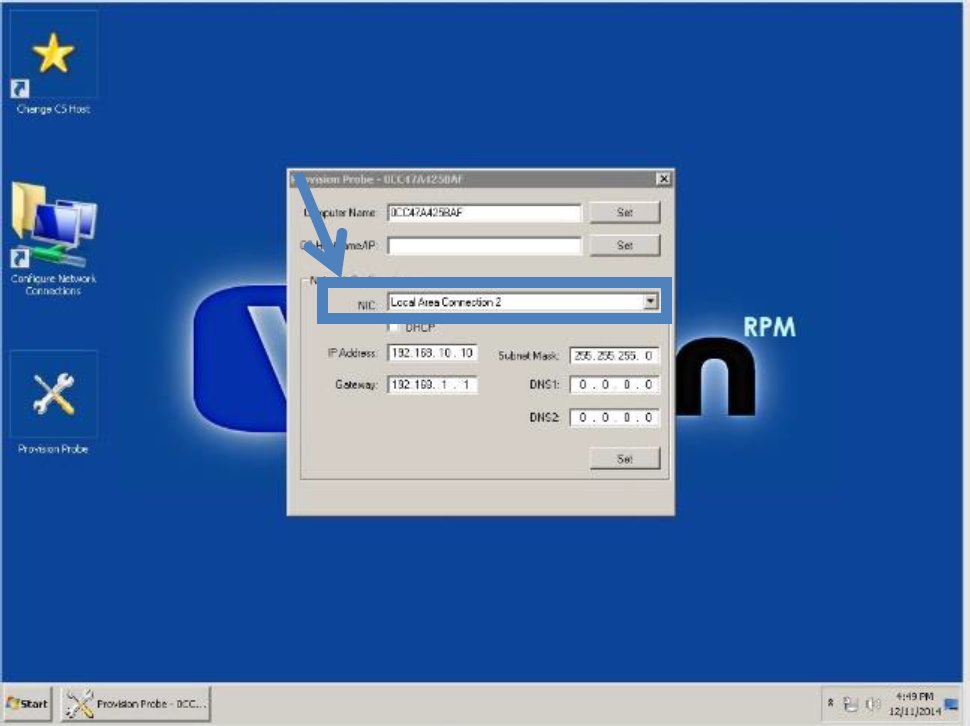
Figure 8.2.2. Volicon Scout Desktop – Provision Probe.exe.
If you do not see “Local Area Connection 2” under the list “NIC”s please make sure that the Ethernet cable is connected to proper port
After confirming the proper “NIC” is selected, enter the Comcast designated computer name into the section labeled “Computer Name” and hit “Set”.
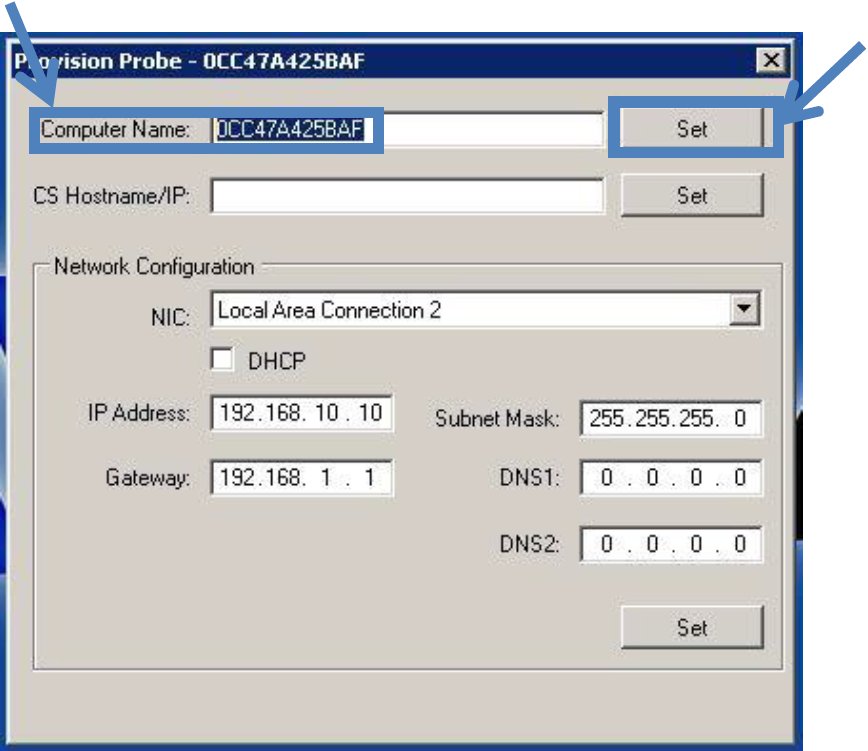
Figure 8.2.3. Provision Probe.exe – Computer Name.
The Tool will update the Computer Name and when finished a line at the bottom of the open window will appear saying “**Computer Restart Required”. Please restart the system at this time. See Figure 8.2.4 for reference.

Figure 8.2.4. Provision Probe.exe – Computer Name Restart.
After the Volicon Scout has restarted double click the “Provision Probe.exe” on the desktop
A window will popup as shown in Figure 8.2.2. Please make sure that the “NIC” selected is still “Local Area Connection 2”
Next, enter 172.28.105.39 in the “CS Hostname/IP:” field and hit “Set” as shown in Figure 8.2.5.
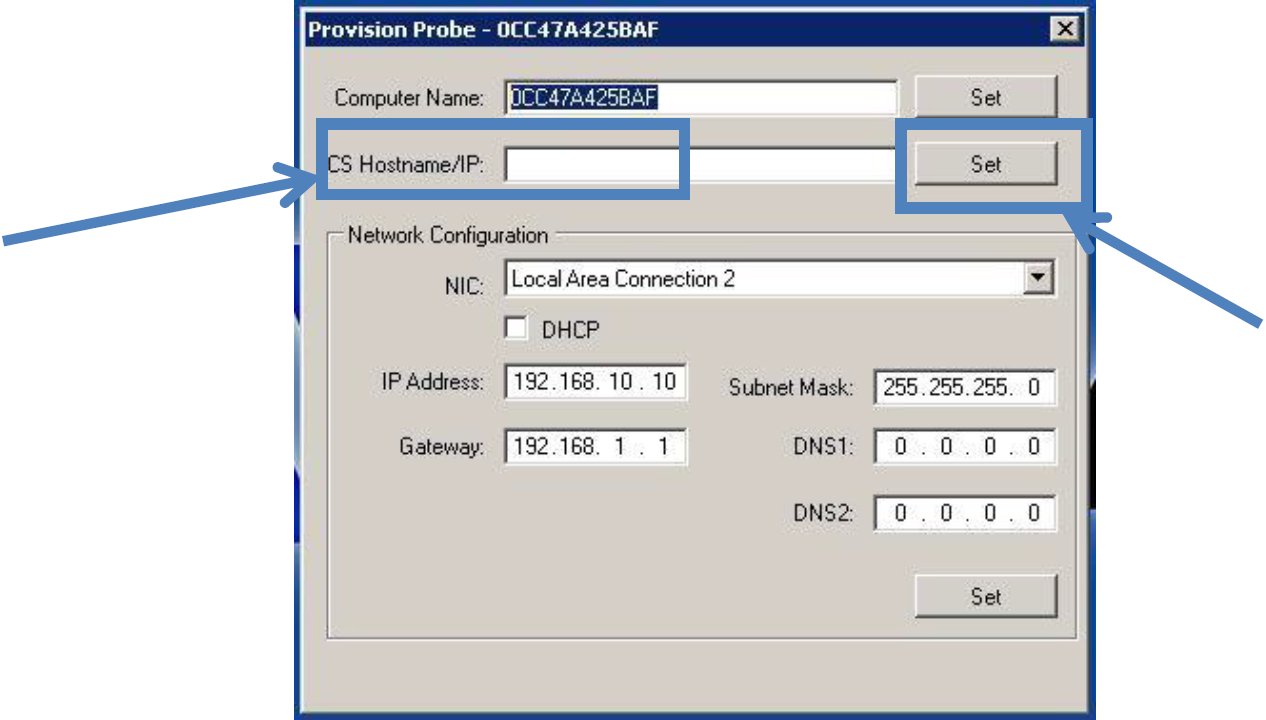
Figure 8.2.5. Provision Probe.exe – CS Hostname/IP.
The “Set” button will greyout and say “Running” while the process takes place. This will take several minutes and when complete the buttons will return to normal
Next, enter the IP Address, Gateway, and Subnet Mask as defined by Comcast into the corresponding fields and hit “Set” as shown in Figure 8.2.6.
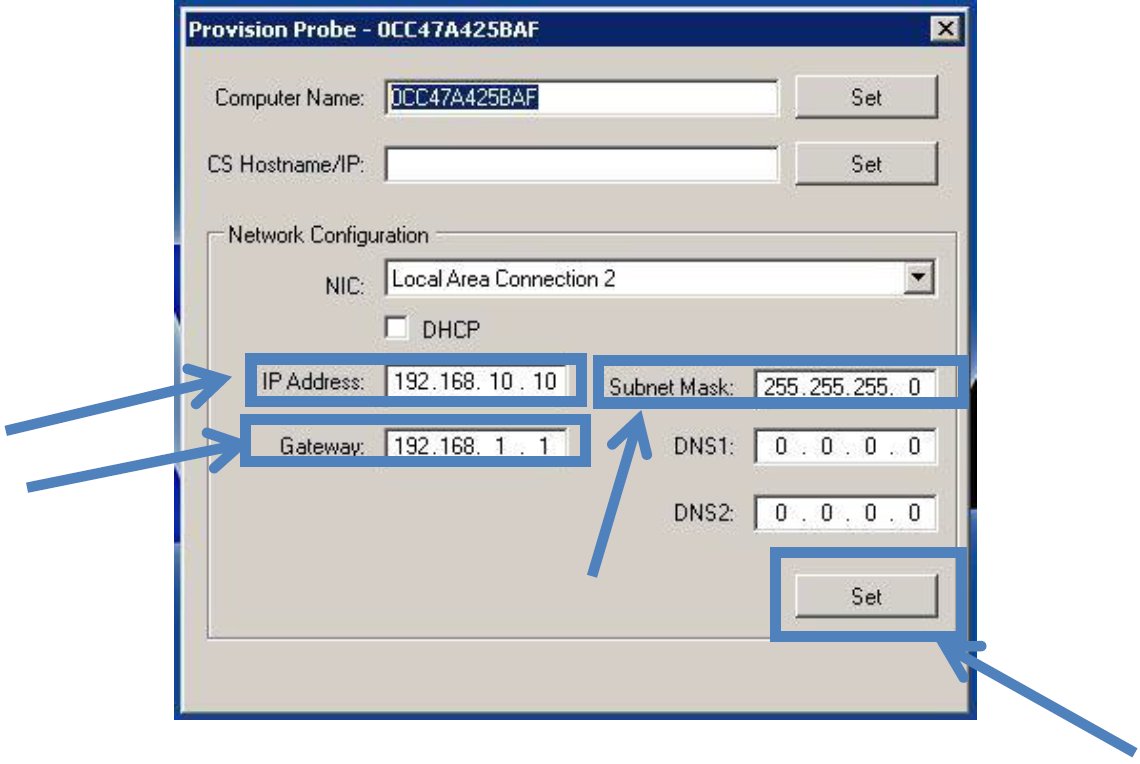
Figure 8.2.6. Provision Probe.exe – Scout Network Settings.
The “Set” button will greyout and say “Running” while the process takes place. This will take several minutes and when complete the buttons will return to normal