Media Clips
Bookmarks
Clipped video from live or recorded media is stored in the Bookmarks page. To access your clips, from the left-hand menu click on Clips>Bookmarks.
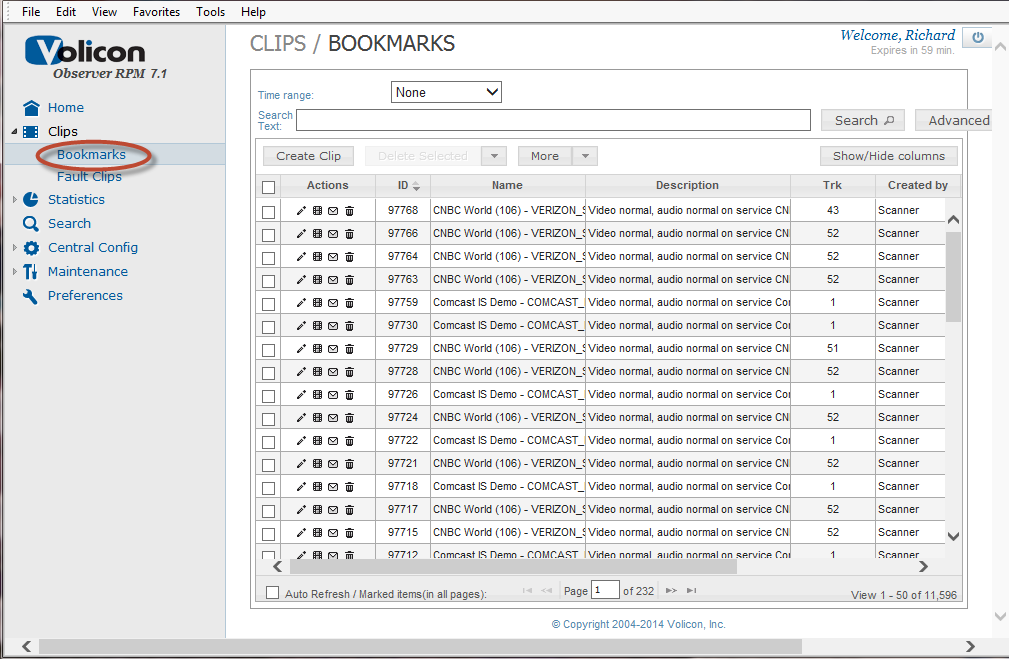
Figure: Accessing Clips
Playing Your Clips
To play a clip, from the Clips/Bookmarks window, mouse over the clip you want to play to highlight it.
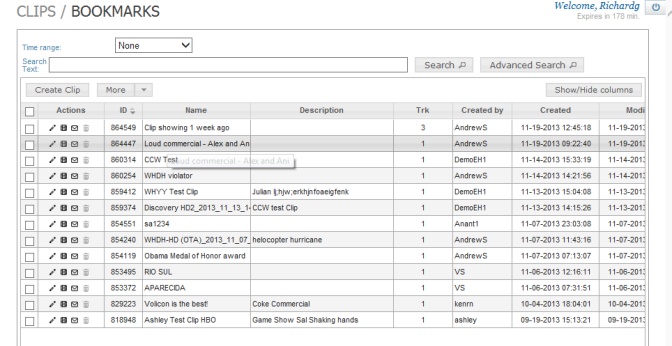
Figure: Highlighting a Clip
Click on the clip. Observer will open a new window and launch the clip.
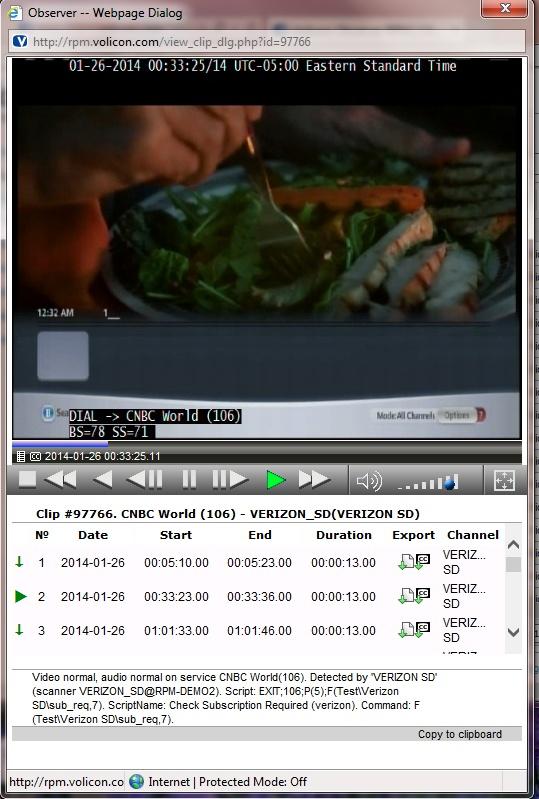
Figure: Clip Window
The clip window contains tools to allow you to control your playback experience, including a player bar, volume controls, and full screen mode. The informational window below the clip tells you the clip number, the clip name, the date, starting time, ending time, and channel of the clip.
It also provides you with two options for exporting the clip:
Export
Export Closed Captions
Manipulating Your Clips
Observer gives you multiple options for manipulating your clips, all of which are accessible to you in the Actions column.
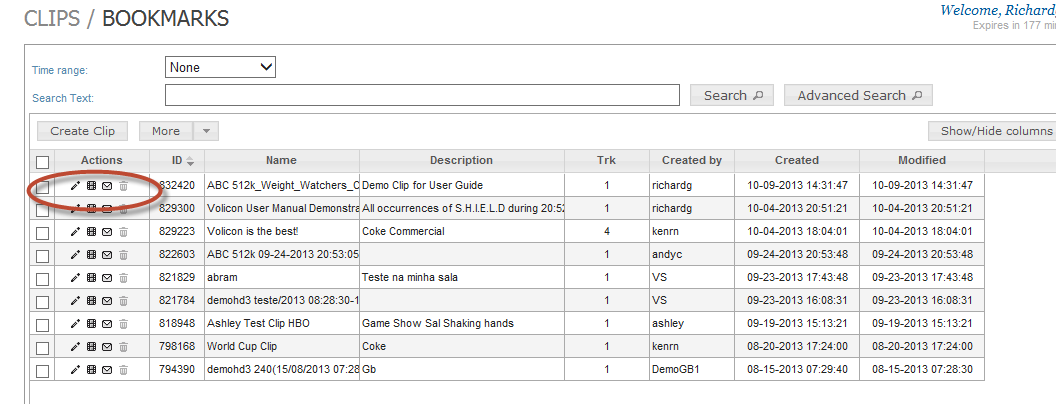
Figure: Actions Column
Two of these actions are particularly important: Edit and E-Mail.
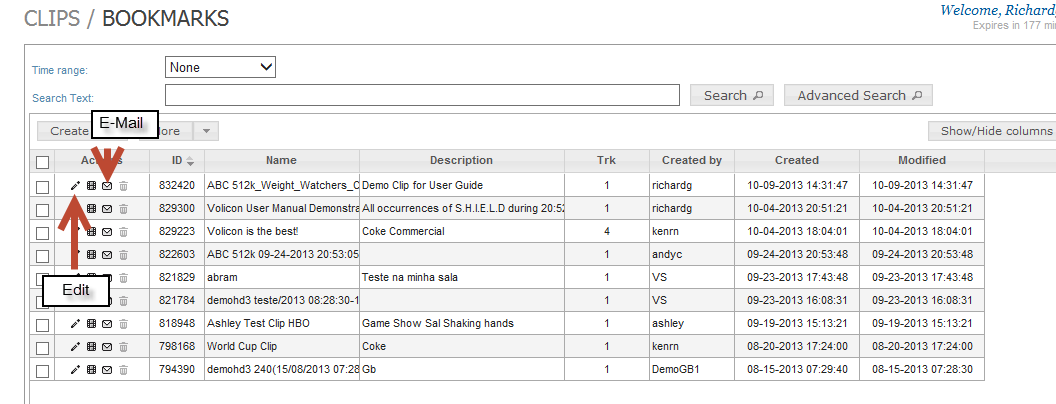
Figure: Important Actions
Editing Clips
Clicking the Edit icon opens your clip in the Edit Clip window.
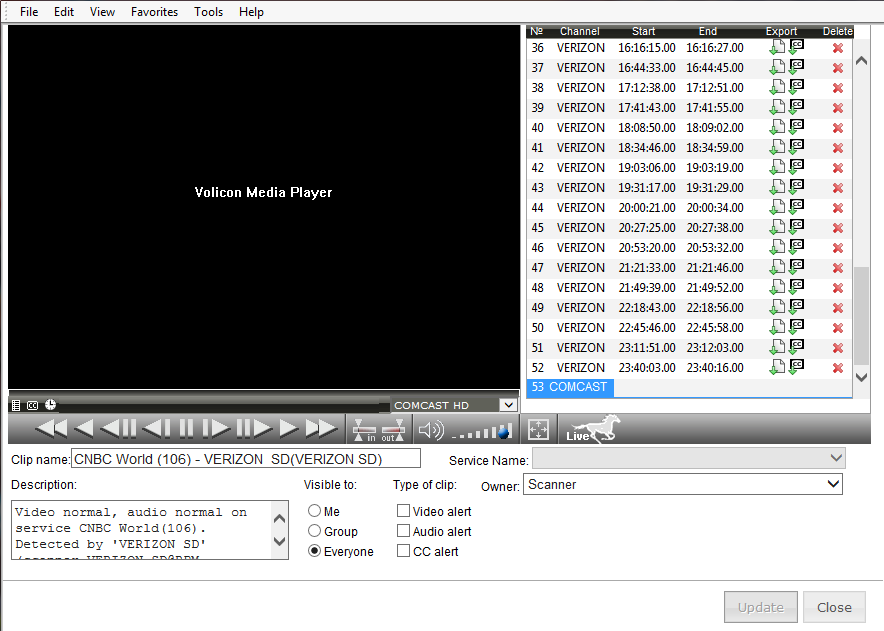
Figure: Edit Clip Window
From here you can view the clip, use the Mark In and Mark Out tools to define a subset of the clip, and edit the clip name and description.
You can also export the content of your clip in two different ways:
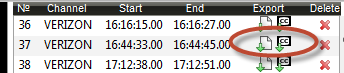
Figure: Export Options
Export
Export Closed Captions
Exporting Your Clip
To export the clip itself, click the Export Clip icon in the Export column of the Edit Clip window.
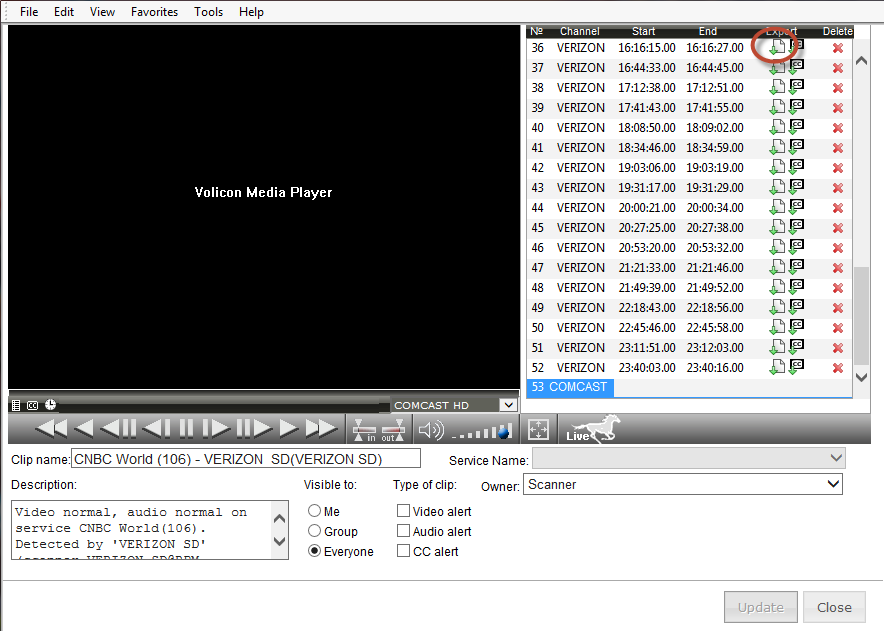
Figure: Export Clip Icon
The –export_to window opens. Volicon automatically creates a default name using the channel name, date and time, but you can edit the name to something more meaningful to the end user. Name your clip, choose the format under Save as Type and the location in which you want to save your clip on your PC/laptop. This clip will not be stored in the Observer; it is a physical copy of the content. Click Save.
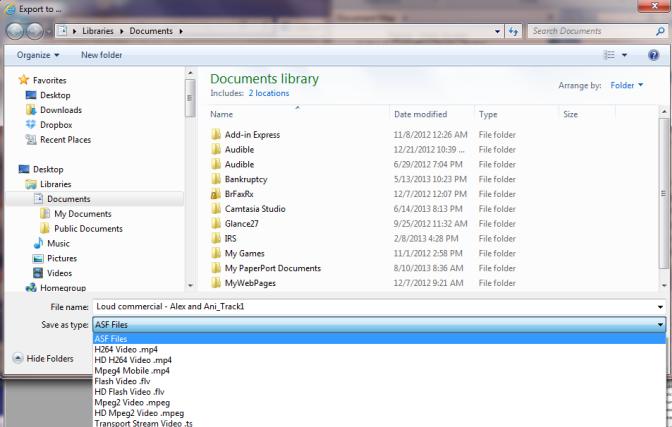
Figure: -export_to Window
Observer will open the Export clip—Webpage Dialog box.
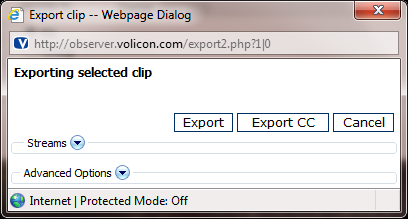
Figure: Export Clip Webpage Dialog Box
This dialog box gives you several options for your export. From the Streams drop-down menu, you can choose which audio languages to include, if more than one audio language is present.
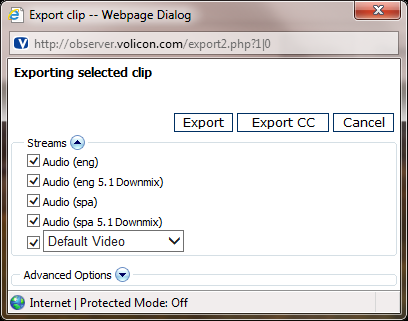
Figure: Streams Drop-Down Menu
The Streams drop-down menu also gives you access to the Default Video dropdown menu, which allows you to choose the resolution at which you export your clip.
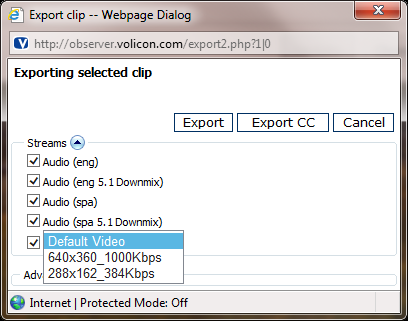
Figure: Default Video Drop-Down Menu
The Advanced Options drop down menu opens nine options for what you include in your export.
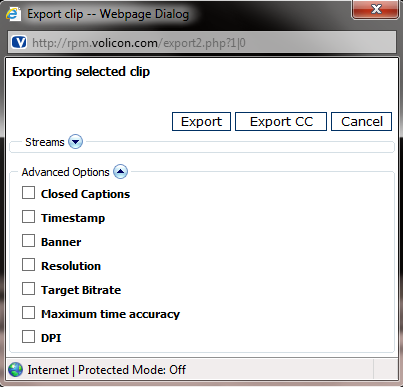
Figure: Advanced Options Drop-Down Menu
Closed Captions: Closed Captions allows you to choose the On Screen Display (OSD) language you want to export, if there is more than one option available.
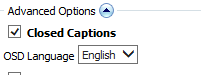
Figure: Closed Caption Options
Timestamp allows you to specify the format for the timestamp used in the export. The default is Month/Day/Year/Hour/Minute/Second/Frame. Change the order of the variables if you wish the time stamp to display in another order.
Timestamp also allows you to specify where you want the timestamp to appear in your export – at the top or at the bottom.

Figure: Timestamp Options
Banner allows you to choose a GIF or BMP file and incorporate it into your export as a banner. To do so, click on the File icon to the right of the field.
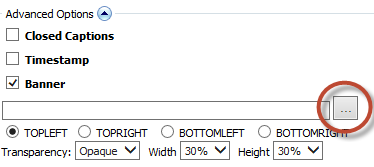
Figure: Banner
Observer will open the Select a banner file window. Navigate to the image you wish to use, and click Open.

Figure: Select a banner file Window
Observer populates the Banner field with the file you have chosen.
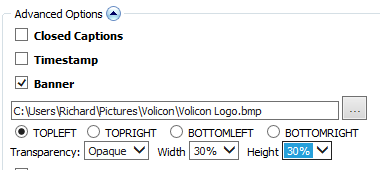
Figure: Populate Banner Field
Choose whether you want the image displayed at the Top Left, Top Right, Bottom Left, or Bottom Right of your export. You may also choose your Transparency, the percentage of Width of the export you want the banner to occupy, and the percentage of Height of the export you want the banner to occupy.
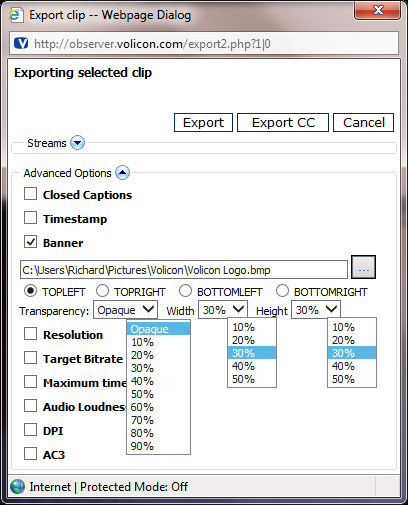
Figure: Banner Options
Resolution gives you the option of choosing the Output Resolution, in pixels, of your export. Make your choice from the Output Resolution drop-down menu.
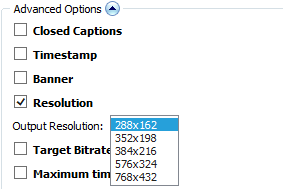
Figure: Resolution Options
Target Bitrate allows you to specify the bitrate you want your exported clip to run at. Make your choice from the Target Bitrate drop-down menu.
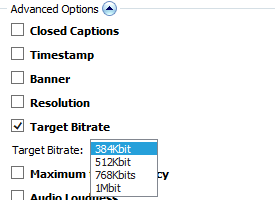
Figure: Target Bitrate
You may also choose whether to export your clip with Maximum time accuracy, and DPI information.
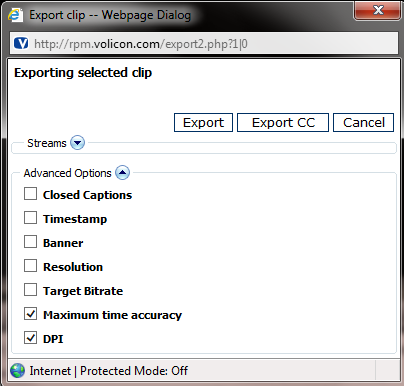
Figure: Additional Options
You can also start the export process from Export column of the Clip Player window.
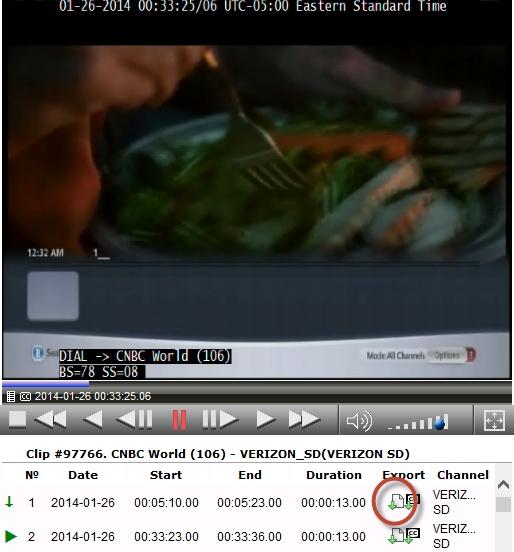
Figure: Export Button in Clip Player Window
E-Mailing Clips
The email function allows you to email a link to the clip only to other users on the Volicon solution. It does not email a physical file, only a hyperlink to an existing clip in the bookmarks section. To e-mail your clip, click on the e-mail icon in the Actions column.
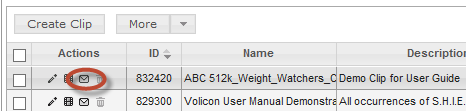
Figure: E-Mailing Clips
Observer will open your default e-mail client and create an email with the name of the clip in the Subject line, and a hyper-link to the clip in the body of the e-mail. The only thing the user needs to do is add a recipient’s email address in the “To:” field.
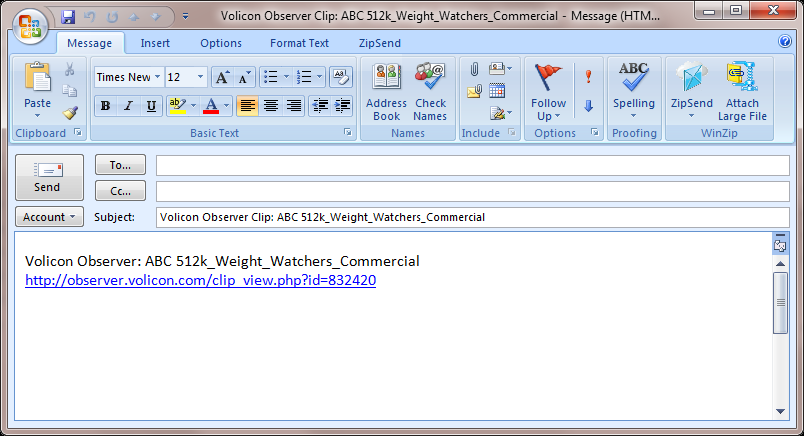
Figure: E-Mail Window
Searching Your Clips
Over time, the Bookmarks folder will expand to include many pages of clips, which can make finding a particular clip difficult. Observer RPM allows you to search for a clip either by ID, name, description or a combination of parameters
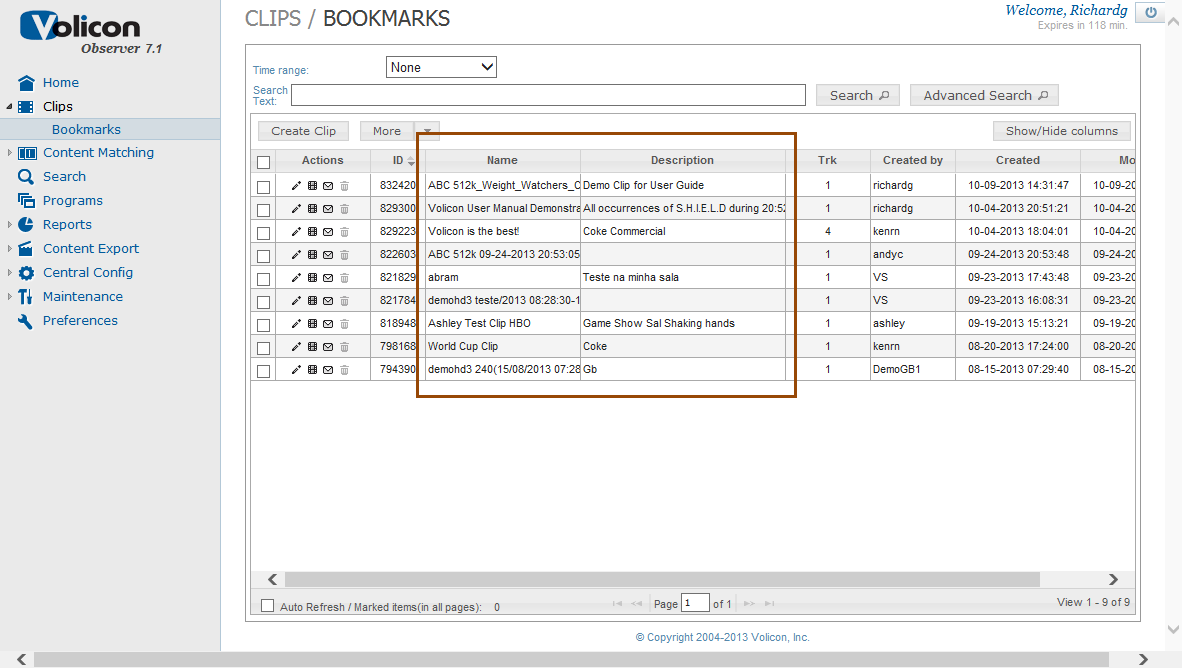
Figure: Searchable Fields in Bookmarks
Simple Search
For a simple search of the Name and Description fields, enter the term you are searching for in the Search Text field and click Search.
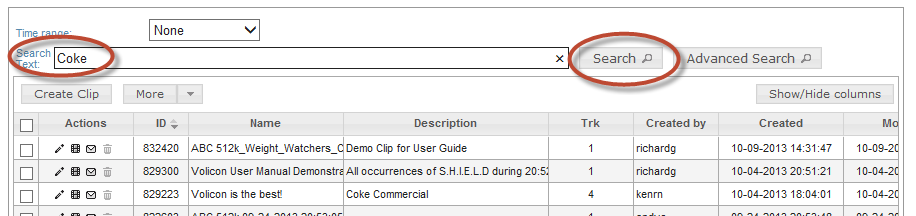
Figure: Simple Search
Observer returns a list of all the clips that have your search term in either the Name or Description fields.
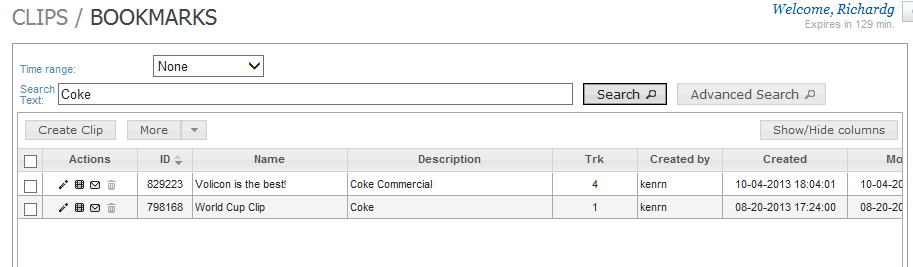
Figure: Simple Search Results
Advanced Search
Observer gives you two tools for narrowing the results of your search: the Time range field and the Advanced Search option.
The Time Range Field
Use the Time range to narrow your search by date and time. The drop-down menu provides you with four options:
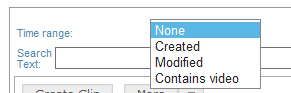
Figure: Time Range Search Options
None (the default)
Created: search by time range of when the clip was created
Modified: search by time range of when the clip was modified
Video: search by time range of whether the clip contains video
Choosing any option other than “None” opens up the Search Calendar.
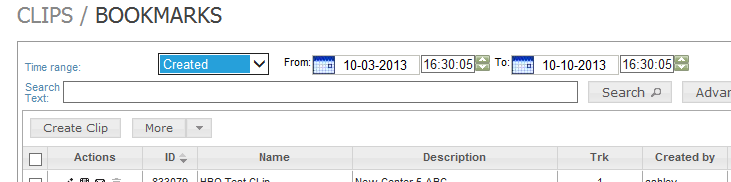
Figure: Search Calendar
Set the start point and end point of the period you wish to search, and click Search.
The Advanced Search Field
You can further refine your search by clicking the Advanced Search button to open the Advanced Search window.
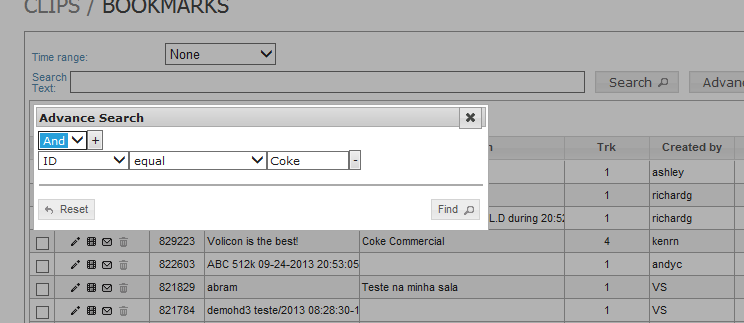
Figure: Advanced Search Window
The Advanced Search window gives you three drop-down menus you can use to quickly narrow in on the results you want.
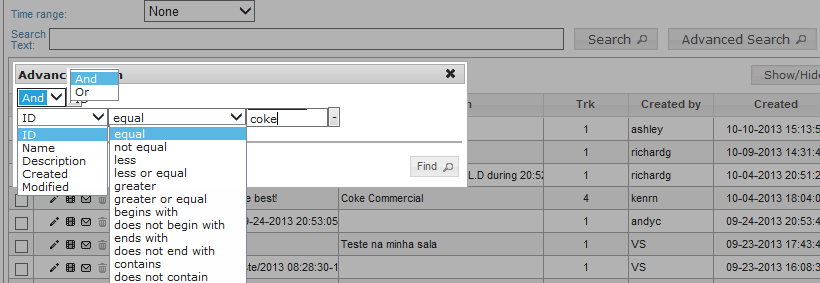
Figure: Advanced Search Drop-Down Menus
Those fields are the:
Boolean Operator Field. This field allows you to use multiple search terms using Boolean logic. If you combine two search terms with a Boolean AND (for example, if you search for Coke AND Pepsi), Observer will return a clip only if it contains both terms. A Boolean OR search, on the other hand, will pull up every clip in which either term is mentioned.
Column Definition Field. This field allows you to search for terms in a specific column.
Variable Field. This field allows you to search for clips that bear a specific relationship to the search term.
Sort clips
Video clip lists can be sorted in ascending or descending order by clicking on column parameters:
ID: Clip’s unique identification number
Name: Clip Name
Description: Clip’s description
Trk: Media Track
Created by: User name
Created: Time created
Modified: Time modified