Fault Clips Tab
Clicking this icon displays video clips flagged as meeting one or more MIS automatic monitoring fault conditions. When the page first opens all search constraints are wild carded so the page will show all bookmarks that include a MIS flagged fault. If there are a lot of faults the search function allows you to narrow down the list.

Figure: Fault Clips
Fault Search
The Search dashboard lets you display only those faults of interest.
Keyword |
Free form text search |
Owner |
Owner the clip is assigned |
Fault Type |
Recoveries, video, audio, equipment and metadata |
Time/Date |
Restrict time and date range |
Channel list |
Click anywhere in the icon to expand or collapse the channel list |
Filter |
Enter all or part of a channel name to limit dashboard display to matching channels |
Last Searches |
MIS caches recent searches allow you to quickly redo an existing search |
To reuse a previous search expand the <Last Search> icon at the bottom of the search pane by clicking the title. Highlight the desired search and press <Search>. To manage search history delete unnecessary old searches hover over the search name and press the <X> to the right. Pressing <Reset> at the bottom of the dashboard clears all searches.
Fault Clip Display Options
The ribbon at the top of the Fault Clips pane allows you to manage and modify captured faults.
 Select/deselect all Fault Clips. If there are no clips this option is greyed out.
 Manually create a new Fault Clip.
 Merge multiple Fault Clips. Allows you to combine multiple reported faults into a single combined clip. The new composite clip shows up in the Bookmarks tab. If there are no clips this option is greyed out.
 Send selected Fault clips – Opens dialog box to email one or more clips to selected user. Optionally create an email subject title. This option is greyed out if no clips are selected.
 Delete selected fault clips. This option is greyed out if no clips are selected.
 When icon is blue the page is automatically refreshed every few seconds. When the icon is white page does not change once it is opened. Clicking the <Auto Refresh> icon toggles between the two modes.
 Grid and List view, similar to other MIS settings. Grid displays a large thumbnail and limited descriptive detail about the fault. In List view the thumbnail is smaller and the selection of descriptive detail is much greater.
 Export list opens an Excel spreadsheet showing details of each clip. The spreadsheet may be opened or saved to your desktop. The Delete all Fault clips option allows you to quickly remove all fault clips.
Manual Fault Clip Creation
The System allows you to manually create a fault clip. This works much the same way as creating a Bookmark. Press the  Add Clip icon at the top of the page. This opens a new page with the channel list on the left. Select a channel, mark the clip, name the clip, optionally include descriptive text for more information and use the Fault Type radio button to specify the type of fault. Press <Apply> at the bottom to create the clip.
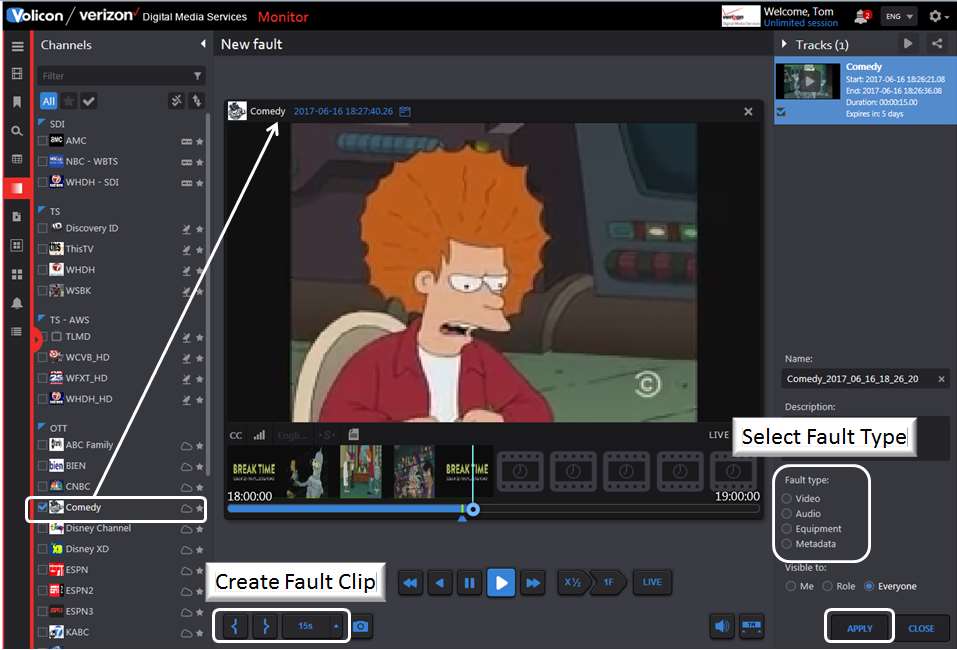
Figure: Manual Fault Clip Creation