Remote server access
Volicon Media Intelligence service administration management access uses the same web-based user interface as other users. As an administrator (with admin privileges) you have access to system level configuration features that provide the ability to add and delete user accounts.
From time to time, direct access to the Windows server may be required. If the particular server is not equipped with local user access capabilities, the built-in Microsoft RDP Remote Desktop feature is handy. There are several precautions to keep in mind when using MS Remote Desktop to prevent interfering with Volicon Media Intelligence service audio and video processing.
Server-side Microsoft RDP
Each server that requires remote access will first need to have the feature enabled. Afterward, select which accounts are able to remotely access the computer. The Windows administrator account is automatically granted access when Remote Desktop is set up.
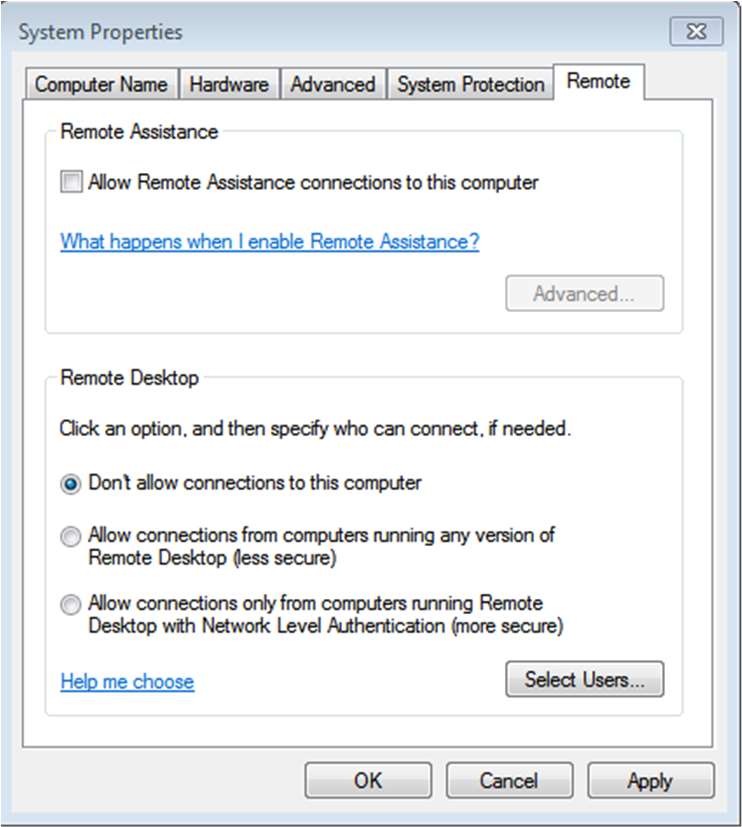
Figure: Server-side Remote Desktop
RDP client
Configure your settings by the following steps when you are using a Remote Desktop connection (MSTSC- Microsoft Terminal Services Client).
From the Start menu, find <Remote Desktop connection>.
Open <Remote Desktop connection>.
Click on the <Local resources> tab.
Note: If you are setting up remote access from Windows XP (no longer supported by Microsoft), change the “Remote computer sound” setting to “Leave at remote computer”, as this is required to ensure that the system remains working correctly.
If you are setting up remote access from Windows 7 or later, use the defaults for “Remote audio”.
Uncheck “Printers” under <Local devices and resources>. Otherwise, the system will generate errors while trying to find and install printer drivers that do not exist on the server.
Optionally, select the clipboard to enable file copy operations between the server and the client PC. To save your changes, go to the <General> tab and press <Save>.
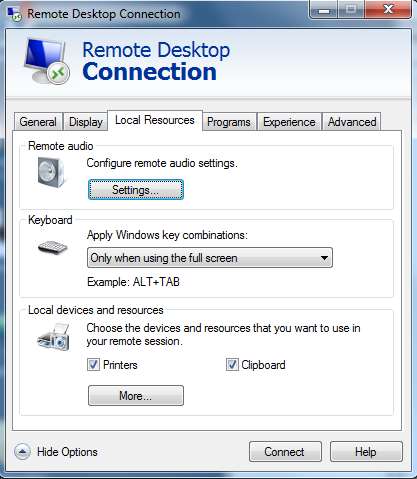
Figure: Windows 7 RDP local resources
Login
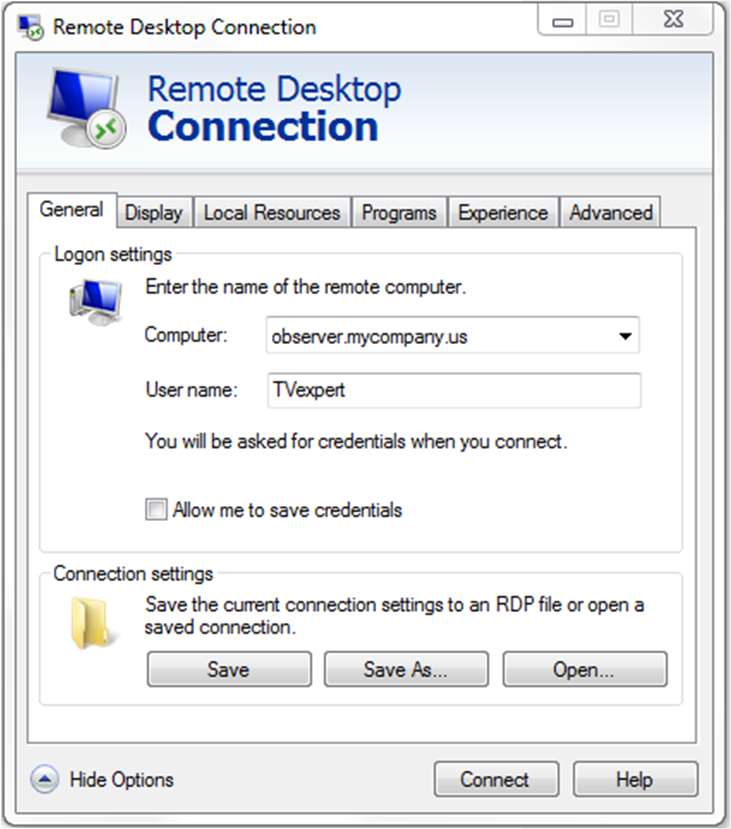
Figure: Remote Desktop login
Open <Remote Desktop connection>.
Enter the URL or IP address of the server.
Enter your username.
If you check “Allow me to save credentials”, Windows will save your login information. Do this only on a secure PC you control.
Press: <Connect>.
Note: Only one person can be logged in at a time. A successful login will terminate an existing session.
If your computer is unable to connect to the remote server, it throws this error message.
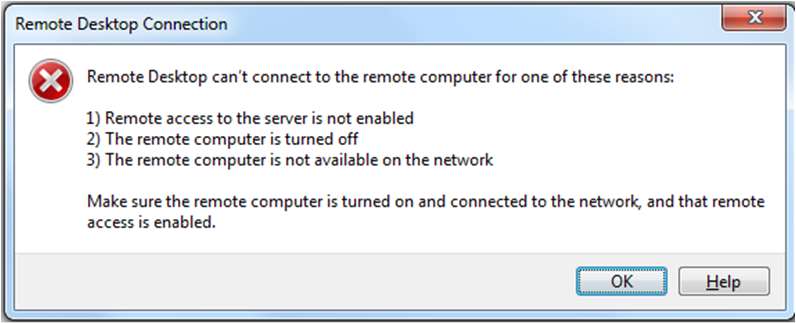
Figure: RDP unable to connect to remote server
Terminate remote session
Closing the window in Windows 7 and later will automatically terminate the session. If you are still using Windows XP (no longer supported by Microsoft), you need to explicitly terminate the session, not just close the window. Just closing the window will leave you logged in.