Capture card debugging
A useful troubleshooting method for investigating audio/video capture problems is to access the card directly from the card’s application suite. This enables you to access the capture card without using Volicon Media Intelligence service.
Blackmagic
To verify a proper operation, connect the video source to the capture card. Launch Blackmagic Media Express and click on the <Log and capture> tab. Assuming everything is working correctly, the source will appear in the Media Express preview pane.
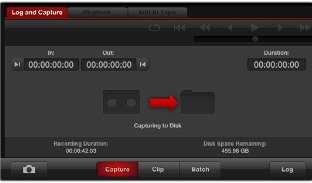
Figure: Capture preview
DekTec
Osprey
On the Osprey 460e cards, audio/video (A/V) can be examined at the input independently of the Volicon Media Intelligence service software. This is useful for general A/V debugging and for audio configuration.
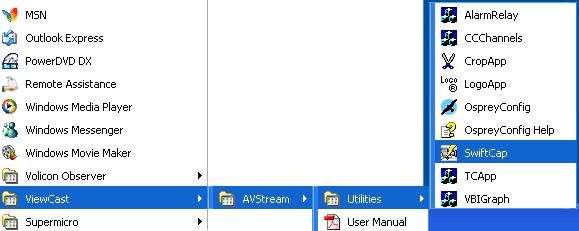
Figure: Accessing ViewCast
At the probe server, go to <Programs> and open the “ViewCast SwiftCap” program.
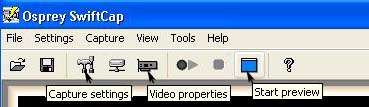
Figure: ViewCast SwiftCap
Select the video channels in “Capture settings”.
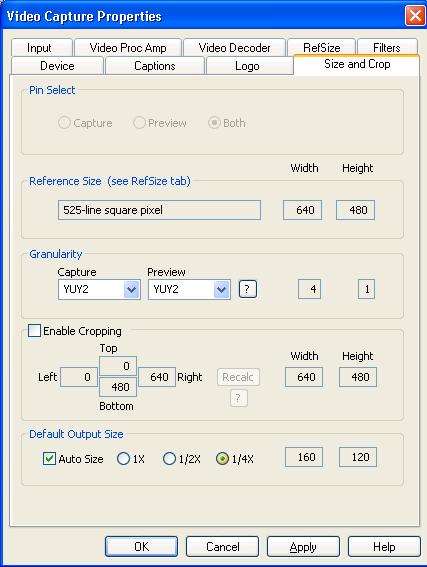
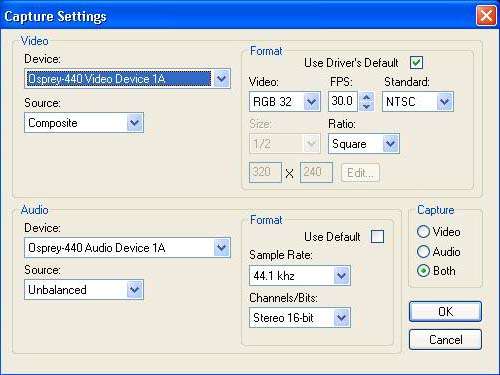
If you are working over Remote Desktop, and network bandwidth is limited, decrease the size of the SwiftCap display in “Video capture properties” by using the “Default output size” selection.
Click the <Start review> icon in the Osprey SwiftCap screen above to examine the video input you just configured.
Adjusting audio with Osprey encoder
In addition to the automatic audio adjustment, search for the “Audio adjust” section above; there is a manual procedure to adjust Osprey cards. From a desktop, select <Start> → <All Programs> → <ViewCast> → <AVStream> → <Utilities> → <OspreyConfig>.
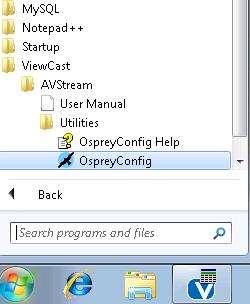
Figure: OspreyConfig
The OspreyConfig panel appears. Expand “Osprey-460e Device 1A” and select <Balanced Audio Filter> or <Unbalanced Audio filter>.
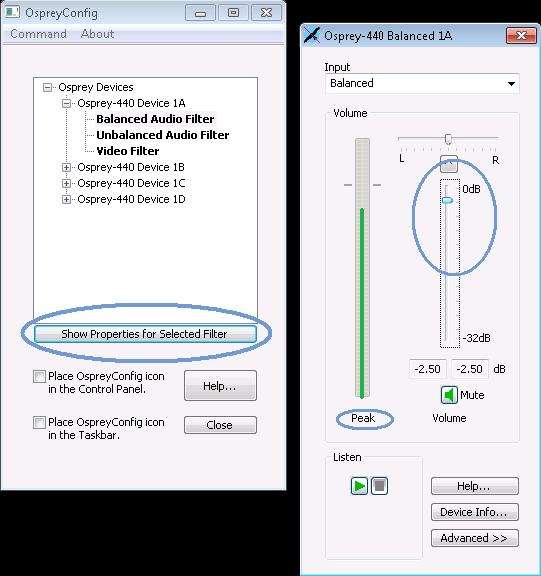
Figure: Osprey filter
Press the <Show properties for selected filter> button. The “Osprey 460e Balanced 1A” window will appear.
Note the “Peak” vertical (green) bar, which indicates the incoming signal level.
The volume bar on the right has a dB grading scale to measure the incoming signal. Move the “Audio gain” handle circled by the vertical ellipse accordingly to adjust the incoming audio level.
Hauppauge
Use the application suite to view input from the Hauppauge card.