Scheduled recording tab
The <Scheduled recording> feature enables you to capture a program using the <Set-top box remote control> feature. The channel dashboard works like other tabs. Use the <Search> function to limit the display to specific encoders.
Pending and completed jobs are displayed to the right. Hovering over a job highlights it in blue. Clicking the <Play> icon plays the program once it has been recorded, and it enables you to create a bookmarked clip. The <Delete> icon removes the recording. If the program has not yet been recorded, use the <Edit> icon to modify the event.
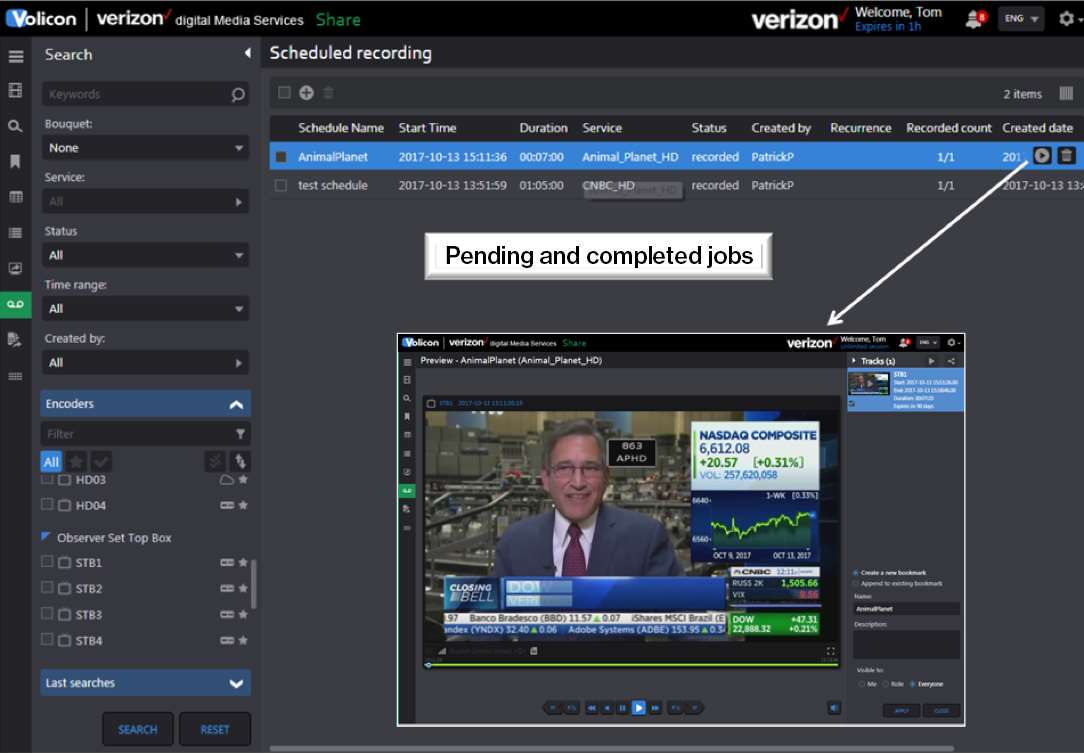
Figure: Schedule recording display
Create a scheduled recording
To create a new scheduled recording, click the <New>  icon at the top of the page. This opens the “Add scheduled recording” pane.
Event name is where you enter a descriptive name for the recording.
Bouquet is the dropdown you use to select a bouquet. Bouquets are logical groupings of channels associated with a STB.
Service is where you select the specific channel you are interested in recording.
From/to is where you enter the start and end times.
Encoder refers to the STB used to capture the program. At any given time, only a single program can be recorded on a given STB. If there is a scheduling conflict, that STB is greyed out. In the example shown, STB1 is busy during the needed time period, so you need to select one of the other STBs.
Recurrence allows you to override and capture the program multiple times; the default occurrence is a single recording.
Notes refer to the optional descriptive text about the event.
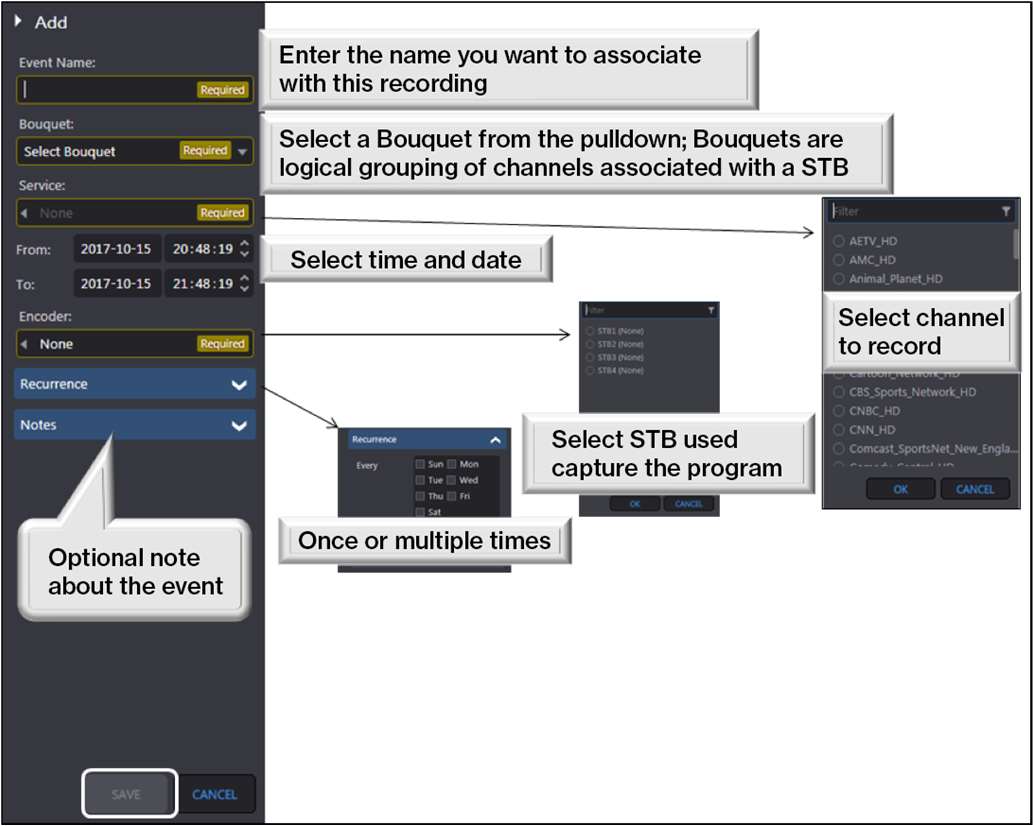
Figure: Create new scheduled recording
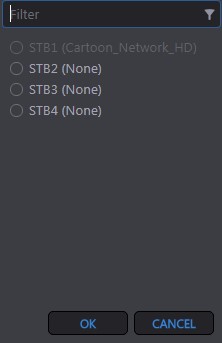
Figure: Schedule conflict STB1
Press <Save> to create the event. A confirmation appears at the top of the screen indicating the event was created.