RAID Maintenance
To perform RAID maintenance:
Log on to the Webserver Backend
Click Start\All Programs\3ware\3DM2\3DM 2 Web Interface (see section above)
Select the Management → Maintenance menu item to go to the main screen
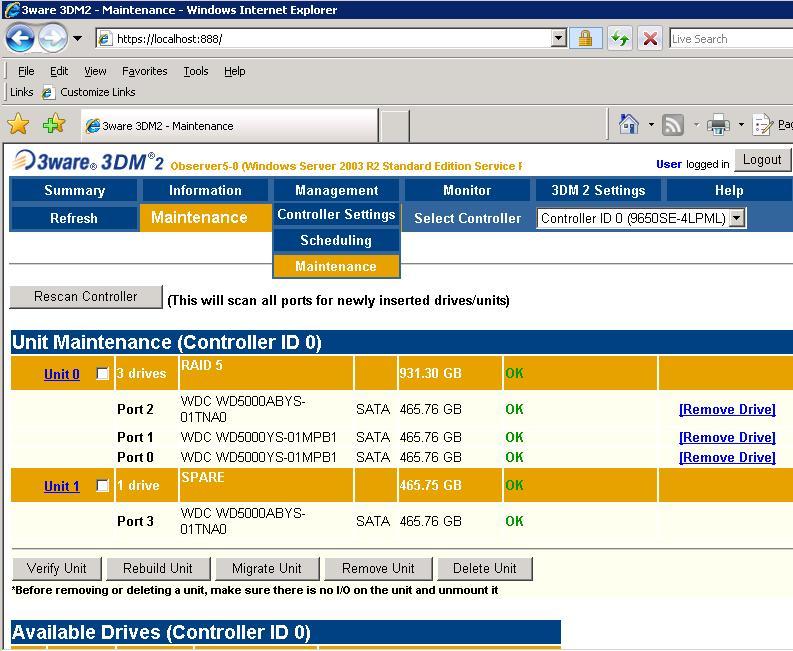
Figure: 3ware RAID Controller
Notice: In this example we have the minimum number of three active drives and one spare.
If one of the drives gets degraded it will be moved automatically down to “degraded”; the system will still be able to run flawlessly on the two remaining drives.
The system will move the spare drive up automatically to join the Raid5 array drives, and will be “Rebuilding” it. You can also initiate the process with the <Rebuilt Unit> button.
Note: Always use the “Remove Drive” link to remove a drive before unplugging it physically.
The <Rescan Controller> button scans the ports on the controller. Rescanning updates the list of the available drives shown and updates the status of all the attached disks. If error conditions have been fixed, the status is updated to reflect that.
The Rescanning process is useful in a variety of maintenance tasks. For example, if you physically plug in a drive and want the controller to recognize it, the “Rescan” process will accomplish that.